Hello,
Christmas in July .... yes, Christmas. And what a better way to celebrate Christmas in July with the new Vintage Artistry Noel collection, with its perfect Christmas colours and gorgeous papers
And along with the paper pack that includes 2 sheets of gorgeous laser cut shapes, there is also an Ephemera pack and rub-ons. And these rub-ons are gorgeous - 3 packs in total. I loved using the rub-ons and had to stop myself from using them all they are that great. Here I have used the Vintage Artistry Noel Tradition paper and cut down the Vintage Artistry Noel Aquifolium paper to adhere to the Tradition paper. I have left a gap wide enough around the edge of the Tradition paper to add these amazing white stitch rub-ons (and these are available in black too). The photo has been added to stacked layers from the Ephemera pack.
I have created the flower cluster with using red and green botanical potpourri flowers and the poinsettia laser cuts from the laser cut sheet, as well as adding in the Santa, leaves and rosette.
I have also added the pine cones from the laser cut sheet, and have curled these slightly to give them dimension. I have added quite a bit of the Vintage Artistry Noel Rub-ons. These rub-on very well, and one can add one rub-on on top of another, like I have done at the top left corner.
I have done the same here at the bottom right corner - there are three sheets of rub-ons in the pack, the colour ones in front and then a sheet of red and a sheet of green sayings and pictures. Here is a rub-ons of the house from the green sheet, and then I have added another tree rub-on to this. Where there are the green and red sayings I have rubbed these on, almost on top of each.
There is also a matching Noel stamp set, which I have used on my layout too. I finished off by adding some art stones - giving it a snow effect and a definite Christmas feel.
Thanks for visiting the blog today.
Michelle
Sunday, 26 July 2020
Friday, 17 July 2020
Amazing - Dusty Attic
Hello Dusty Attic fans
It is my turn to feature a project using the beautiful Dusty Attic moodboard for July
Aren't these colours just soooo beautiful? I just love these gorgeous soft colours. Here is my take on the moodboard:
Here I have used lots of different chipboard pieces. The fancy corners (DA2270), the title Amazing (DA2503) and the butterfly (DA2385) have been first painted in white acrylic paint and then adding the Dusty in Colour Dusty Pink (DA0907). The squiggly frame (DA2344 and the wildgrass (DA2542) have been painted in green. The parrot (DA2598) has first been done in green and then brushed over with Dusty Pink paint.
I have placed the fancy corners on the page first and then added foam tape to the photo before adding the photo to the page and ontop of the fancy corners.
I have then glued the frame to the photo at an angle, and arranged all the fussy cut flowers around the photos. I have tucked the wild grass under the flowers.
The butterfly is then added to the flowers. I have then added a gorgeous quote "When you stop and look around, this life is pretty Amazing (DA2545).
These are the products I have used:
Thank you for visiting the blog. Happy creating!
Cheers
Michelle
It is my turn to feature a project using the beautiful Dusty Attic moodboard for July
Aren't these colours just soooo beautiful? I just love these gorgeous soft colours. Here is my take on the moodboard:
Here I have used lots of different chipboard pieces. The fancy corners (DA2270), the title Amazing (DA2503) and the butterfly (DA2385) have been first painted in white acrylic paint and then adding the Dusty in Colour Dusty Pink (DA0907). The squiggly frame (DA2344 and the wildgrass (DA2542) have been painted in green. The parrot (DA2598) has first been done in green and then brushed over with Dusty Pink paint.
I have placed the fancy corners on the page first and then added foam tape to the photo before adding the photo to the page and ontop of the fancy corners.
I have then glued the frame to the photo at an angle, and arranged all the fussy cut flowers around the photos. I have tucked the wild grass under the flowers.
The butterfly is then added to the flowers. I have then added a gorgeous quote "When you stop and look around, this life is pretty Amazing (DA2545).
Thank you for visiting the blog. Happy creating!
Cheers
Michelle
Monday, 13 July 2020
Snapshot - 49 & Market
Hello 49 and Market fans
Today I have played with the new Vintage Artistry in Colour Butter - and I am so in love with the yellows in this collection, the papers and the laser cuts are really beautiful, as is all the beautiful coordinating ephemera and washi tape that go with this gorgeous collection. Here is my layout with my gorgeous daughter.
Using the "Satchet" paper from the collection, I have added some iridescent texture paste using a script stencil and then added strips of Butter washi tape down the middle, stamping with the "Springtime Harmony Stamp". The photo is then matted with frames from the laser cut shapes in the paper collection, and adding the lace laser cuts to the edge. The doily is also on the same laser cut sheet, but I have fussy cut the doily out and added under the photo matt. There is also the gorgeous window frame in the laser cut sheet added behind the photo, and then added some pieces from the Butter ephemera pack.
I have used two different types of flower ranges - the Maura's vineyard - Chardonnay and the butterscotch sugar posies and the leaves from this pack around my photo. I have then added leaves from the Wander layered embellishments, as well as the little wooden heart sign among the flowers plus the camera. The wishing bubbles and the title are also from the Wander layered embellishments.
Thank you for visiting the blog today, and have a great week!
Michelle
https://www.49andmarket.com/product/vintage-artistry-butter-12x12-collection-pack/
https://www.49andmarket.com/product/vintage-artistry-butter-washi-tape/
https://www.49andmarket.com/product/springtime-harmony-stamp-set/
https://www.49andmarket.com/product/vintage-artistry-butter-ephemera-stack/
https://www.49andmarket.com/product/sugar-posies-butterscotch/
https://www.49andmarket.com/product/wander-layered-embellishments/
Saturday, 4 July 2020
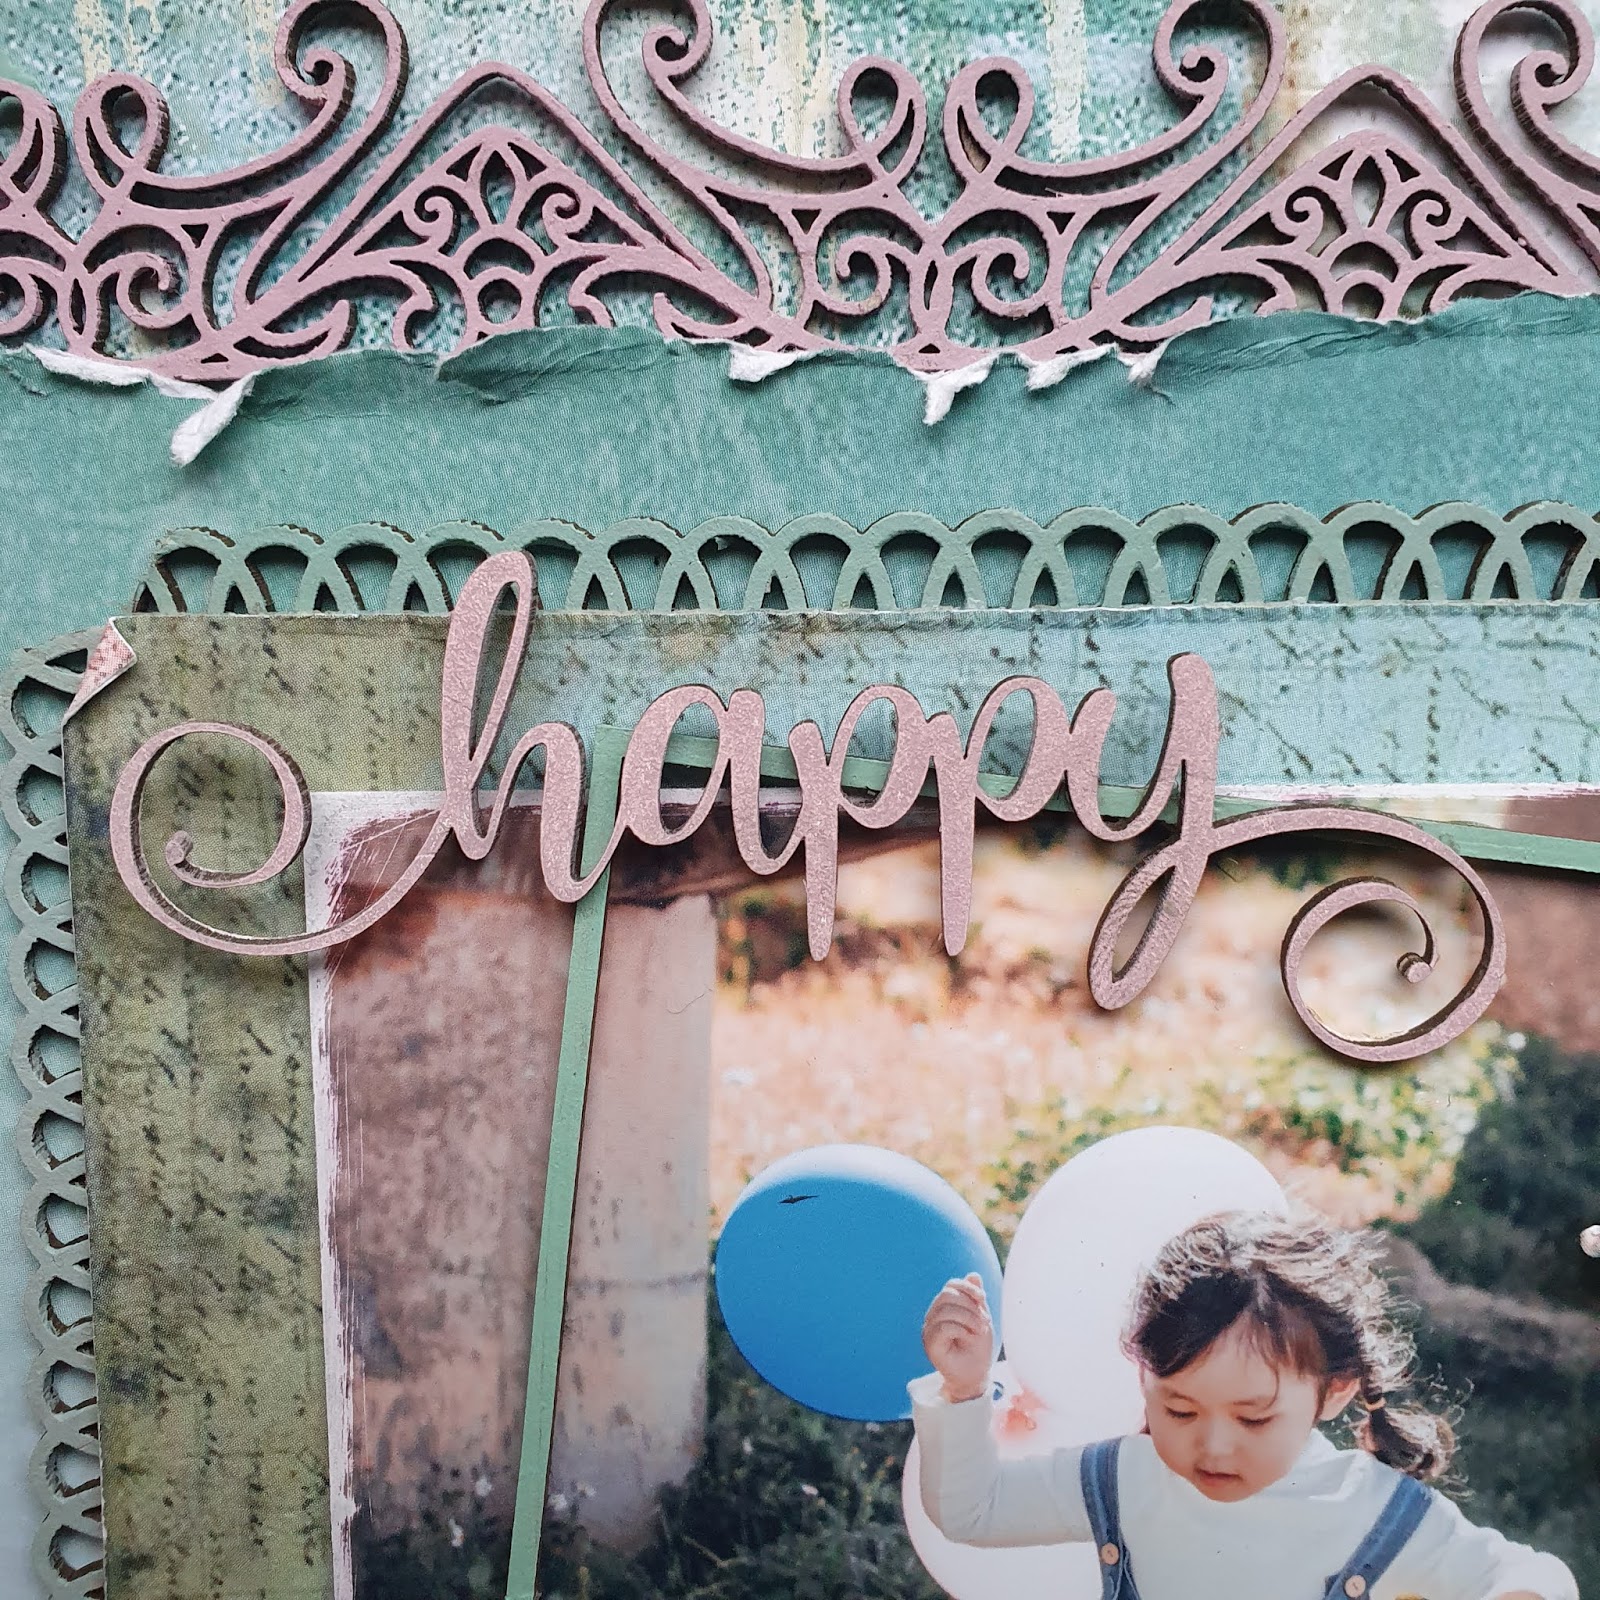
Happy - Dusty Attic
Hello Dusty Fanatics
Half the year has gone, can you believe it? New month means a new project, and here it is
Using a Stamperia range of papers I have created my layout using fancy trims and foliage for my layout. There are two different types of fancy trim used here. The smaller one Fancy Trim #23 I have cut to fit my paper under the photo.
I have used the larger fancy trim #15 under the torn page. This is a lovely trim - which has two different sizes.
Among the flower cluster I have added foliage #22
The frame over the photo is from the Get Framed - Rectangles (these come in different sizes, which is great for all sorts of uses)
All chipboard has been painted with Dusty Attic's Dusty in Colour acrylic paints
These are the products I have used:
Michelle
Half the year has gone, can you believe it? New month means a new project, and here it is
Using a Stamperia range of papers I have created my layout using fancy trims and foliage for my layout. There are two different types of fancy trim used here. The smaller one Fancy Trim #23 I have cut to fit my paper under the photo.
I have used the larger fancy trim #15 under the torn page. This is a lovely trim - which has two different sizes.
Among the flower cluster I have added foliage #22
The frame over the photo is from the Get Framed - Rectangles (these come in different sizes, which is great for all sorts of uses)
All chipboard has been painted with Dusty Attic's Dusty in Colour acrylic paints
These are the products I have used:
DA2526
DA2581
DA2574
DA2374
DA2575
Thank you for visiting today,Michelle
Sunday, 28 June 2020
Captured Moment - 49 & Market
Hello 49 & Market fans
I have had such fun creating a layout using the new release Vintage Artistry Color - Lilac. The colors are beautiful and the lilac is so rich.
I so loved working with this range. The collection has such beautiful patterned paper and the laser cut sheet has some great die cuts to use. I have used a plain cardstock and cut down the "Ingenue" paper and then distressed it before adding it to the cardstcok. I have fussy cut some leaves from the Gestural paper added to the flower cluster. I have added washi tape to the centre of page - and then added some stamping on the edges of the washi tape using the Irrevocable Beauty Wander stamp - using the tape measure and flower stamp.The photo has been matted on various pieces from the Lilac Ephemera Stack pack.
The edges of the Ephemera have also been distressed. There is a window die cut in the 12 x 12 lilac collection, which I have cut in half and adhered on either side of the photo matt. The flower cluster is made up of two different sets of flowers - the Huckleberry Sugar Posies and the Huckleberry Sugar Stems, and then adding the die cut flowers from the 12 x 12 paper collection.
I have dotted some prills on the flowers and finished off with stitch stamping the corners of my layout using the Crazy Stitching Stamp.
Thanks for visiting the blog today,
Michelle
Monday, 22 June 2020
You Are Purrfect
Hello from a very cold and wintery New Zealand
Today I am back on the blog with a layout created for the June moodboard
Thank you for visiting, and you still have time to take part in the moodboard challenge to win Dusty Attic voucher worth $50.
Take care,
Michelle
Today I am back on the blog with a layout created for the June moodboard
I love the orange and blue tones, and have taken to using the leaves as my inspiration for creating my layout
Using half a large clock from the skeleton clock pack DA0430, I have painted this in teal/blue and adhered this to the page, sanded the edge of the photo and tucked into the inside of the clock with the left corner just over the edge of the clock. The You Are Purrfect title DA2433, has been painted with a grit-like orange paint - which gives it a lovely rough finish.
I have then done a lot of fussy cutting from various ranges of paper collections and created flower clusters. The leaves are from the tropical foliage #9 DA2537 - and I love the detail that has been engraved in these beautiful leaves. I have sponged these very lightly with paint, so that the paint does not fill the detail and get lost.
The arrows are also from Dusty Attic which I used to try and created emphasis on the title leading to the photo of the cat.
Here are some more close ups of my layout
These are the products I have used:
Take care,
Michelle
Saturday, 13 June 2020
Treasured Memories - 49 and Market
Hello 49 and Market fans
I am sharing a masculine layout with you today using a mix of papers and embellishments.
The lighter page is the Irrevocable Beauty Cultivate paper, and I have covered the flower print of this paper using a piece cut from the Old School High School paper. I have also stamped on the lighter page using the script stamp from the Postcards from Paris stamp. I have taped the join down using Vintage in Artistry Natural Washi tape, and I have also added this down each side of the paper as well. The cogs and the barbed wire frame are mixture of chipboard from the Great Outdoors, Timeless and Remember Today archival 6 x 6 archival boards. These have all been painted using a range of browns and coppers to resemble rust.
The photo has been matted on a range of laser cut pieces from the Vintage in Artistry Natural mini collection and the Vintage Remnants laser cut frame no 2. The plastic cogs are from the Ethereal Layered Embellishments, which I have cut up to fit with my page.
There are also Vintage in Artistry Sky Stitched frames layered among the laser cut pieces. The wording "Picture Perfect", "Love this Moment" and "Treasured Memories" are from the laser cut sheet included in the Captured Adventures 6 x 6 Collection pack. I have finished off adding splatters of white and black ink, and brown prills.
Have a great weekend!
Take care,
Michelle
Subscribe to:
Posts (Atom)