Saturday 26 February 2022

Mini Album - 49 & Market

Greetings to you all! 

I have done something a little different today by creating a mini album from the ARToptions Avesta card kit. This kit is absolutely beautiful providing you with 8 cards and 8 matching envelopes, 2 rub-on transfer sheets, and 8 sticker seals (also matching) to close your envelopes. 


I started with attaching the envelopes and the close over flaps and attaching these to each other. Where the triangular piece was attached I only added tape to the bottom edge. This would then allow me to use these triangle pieces to attach additional pages - like the cards or some of the ephemera. Once this was all stuck down, I then folded the envelopes to create a concertina effect - as seen in the above long photo. This enables you to use both sides for the album. The cover is made with 2 pieces of chipboard slightly larger than the envelopes. These hard covers were covered with the Avesta Precocious paper, the flower part of the paper is at the top of the album, and I have added a rub on flower to the bottom right of the cover as shown in the collage top left photo above and "the good life" banner is from the Avesta chipboard pack. The inside of the covers have been finished off using the paper packing that comes with the card kit - it is beautiful and I just had to use it!
Decorating the album was done by adding some of the cards folded into the envelope pieces - photos can be added to the inside of the cards - I have also added plain paper pieces inside the envelopes. Adding the seal stickers to these and some chipboard pieces. 
In the collage above, the photo on the bottom right is an example of what I mentioned earlier. Where the triangular flaps are attached, I have used one the Avesta ephemera pieces, folded this in half and attached to the triangular piece to create an extra page, and turning this over, you can add a photo behind this. This is decorated with Avesta rub-ons and Curators Essential stitched washi tape. I have added the frames from the ephemera pack creating it as a pocket to tuck in some of the ephemera tickets and tags. Behind this pocket is a large piece of the Avesta floral fabric tape added as a background, and I have also added rub-ons from the rub-on pack that is included in the card kit. The tags on the bottom left corner, is another lovely addition to this range - matching tags already stringed in all sorts of shapes and sizes.
I had so much fund creating this mini album from the card kit. The card kit is really beautiful!

Thanks for visiting the blog today.

Take care,
Michelle


Friday 11 February 2022

Captured Together - 49 and Market

I am so loving all these new releases - there is just such fabulous new, and gorgeous products. Todays blog write up features a layout created with Curators Essentials and Curators Botanical

The base page of the layout is the reverse side of the Curators Botanical Flutterology paper. I kept the bottom strip on the paper and trimmed the paper down to 12" x 12" at the top. I added stitching washi tape at the bottom of the page from the Curators Essential Washi Tape Stitch Set. I then added layers of Curators Essential Ephemera, distressing the edges behind the photo, adding in Curators Essentials Laser cuts between these layers too. 
Before I adhered the photo matt, I put this down on the paper to get an idea of where I wanted to place this, as I wanted to add a piece of Curators Essential Adverts Wash Tape behind the matting. I tore this roughly and stuck this down, before I adhered the photo matting. I then added some rub-on stamps to the matting pieces
Once this was done, I cut out pieces of the script type rub-ons from the 8"x6" set and added these under the photo matts, and then placing the "coffee" stain rub-ons on top. I tied some twine around the photo add "Best of Times" Ephemera tag to it.

I finished off adding the title "Captured Together" which is also on the 8" x 6" rub-on sheets.

Hope you enjoy this new release - Curators Botanical and Curators Essentials - I know I have thoroughly enjoyed have a play with these new products.

Take care,
Michelle


Wednesday 9 February 2022

SIMPLY Perfect - Dusty Attic February Moodboard

Hello Dusty Attic fans

Back with the Dusty Attic moodboard inspiration - lovely calming colours for this month.

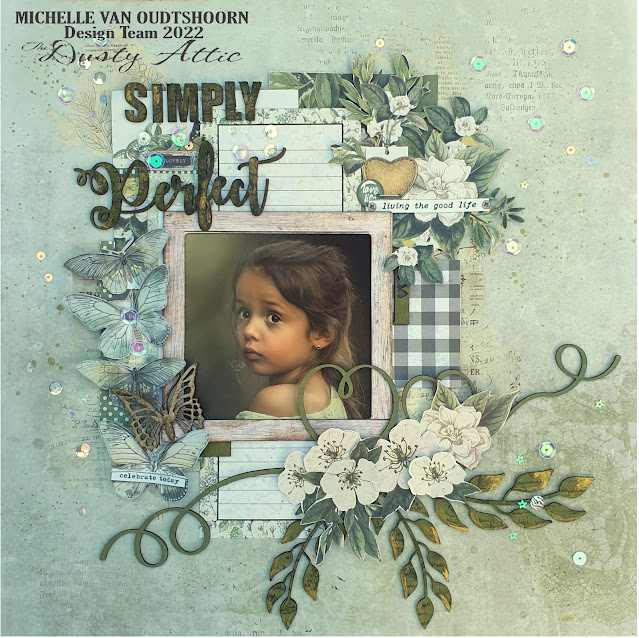
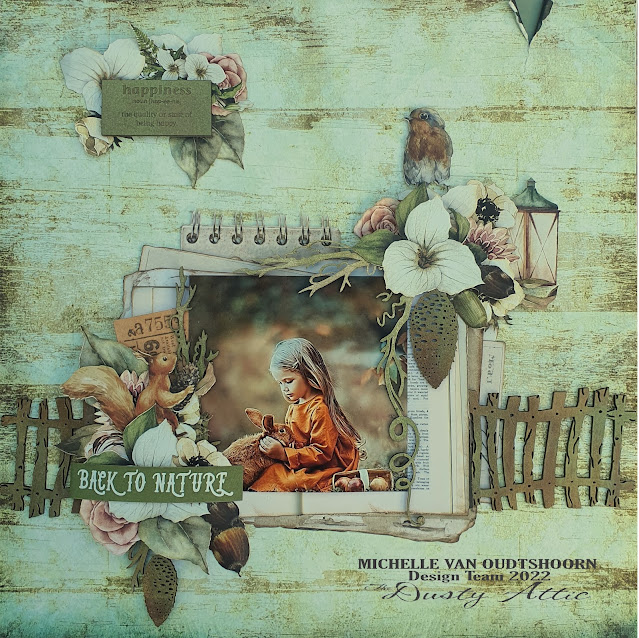
And here is my layout that I have created from this moodboard:
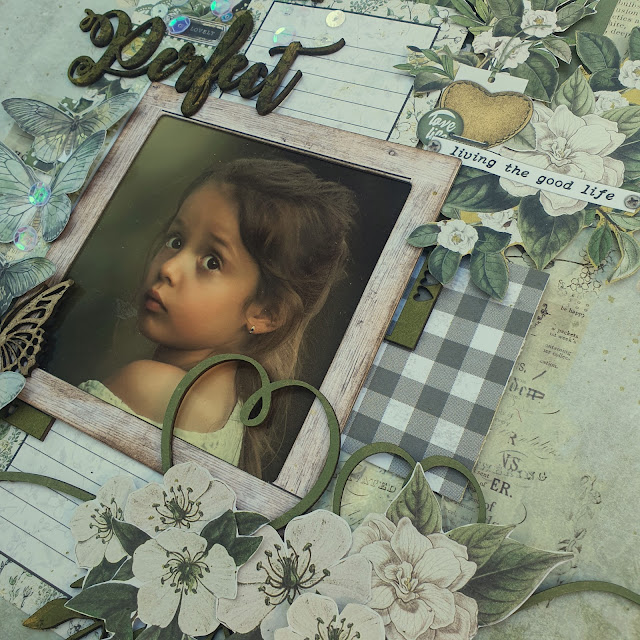
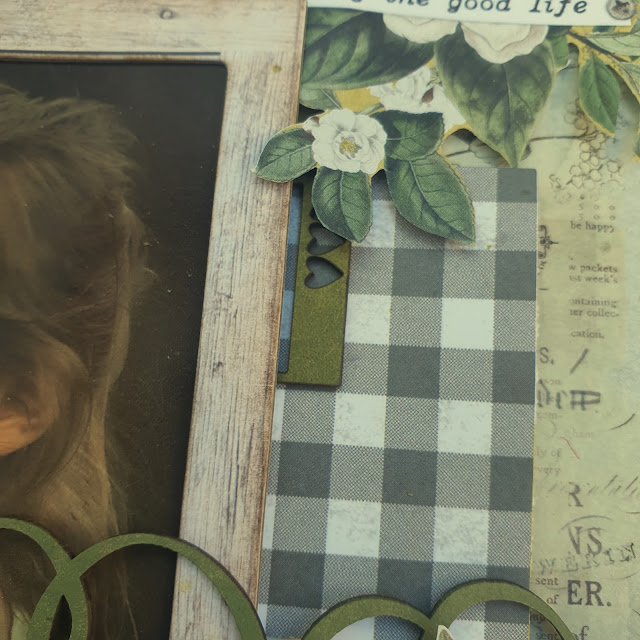
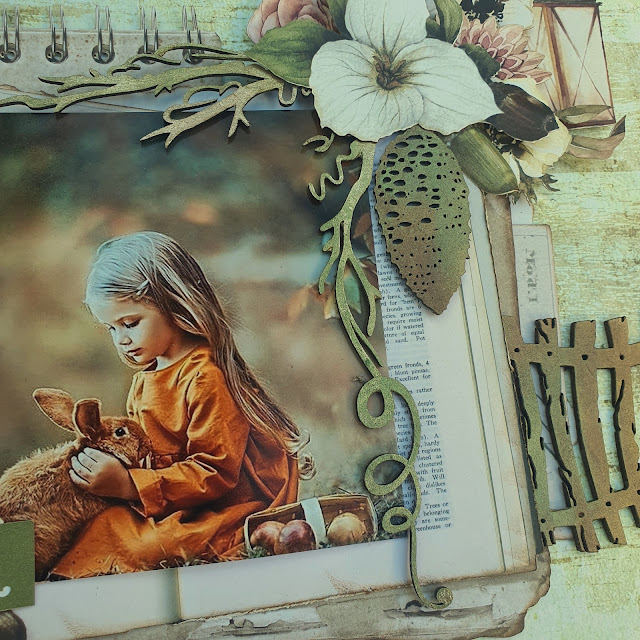
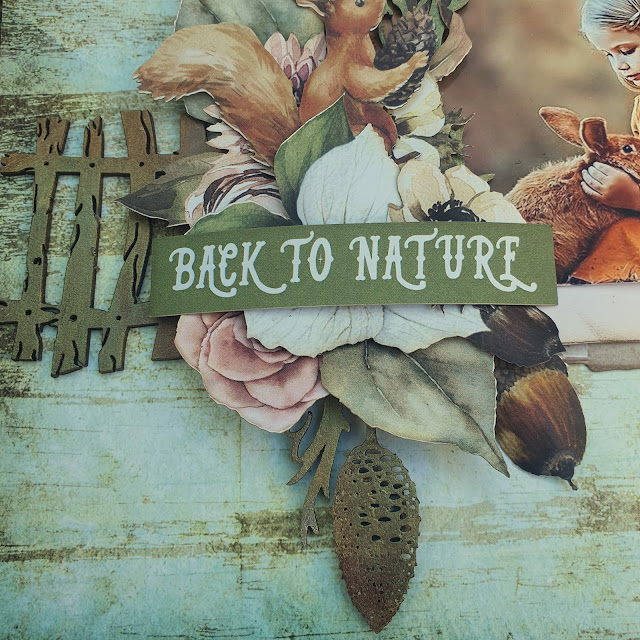
This is a Simple Stories paper collection that I have used to create my layout. I first cut some papers and arranged these to the centre of the paper, before adding the framed photo to the centre. I then painted the Two Strong Hearts chipboard (DA2656) with Dusty in Colour Pesto paint and added this to the corner of the photo frame before creating the cluster of fussy cut flowers.
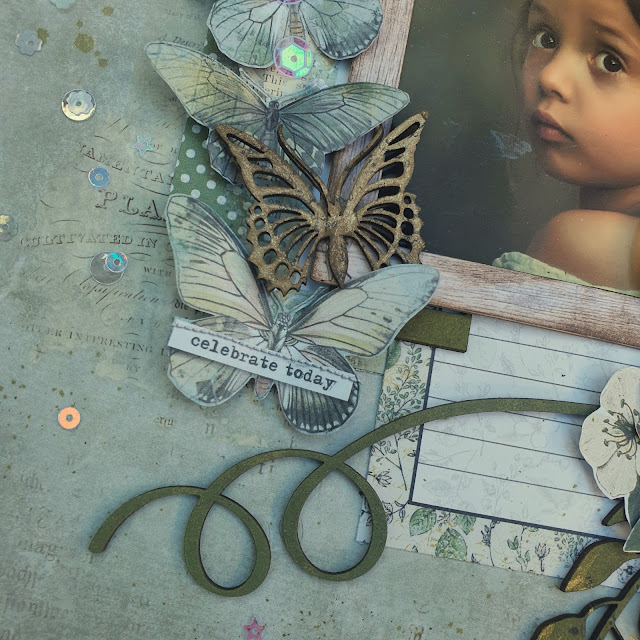
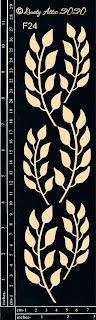
The leaves DA2636, were then painted in a darker green paint, adding some gold paint to the edges. Once dry, I stamped these with a script stamp. I then inserted these under the flower cluster
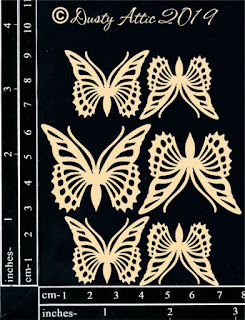
The butterfly (DA2385) was painted with a light brown metallique paint and adhered to the corner of the frame, adding the fussy cut butterflies around this.
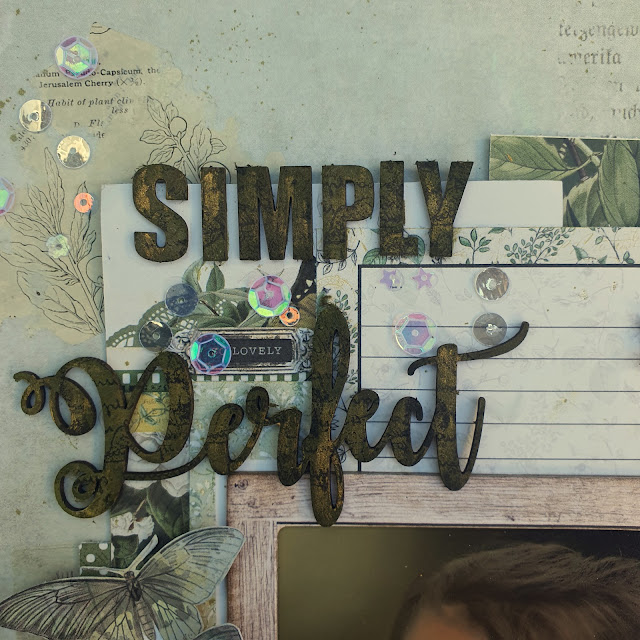
The title "Simply Perfect" (DA2509) was also painted in the same darker green paint, brushed over with gold paint and then stamped with a script stamp.
The title also includes two little slides with some hearts cut out of the bottom piece. I have tucked these under the photo frame 
I finished off adding some sequins to the page. I love the sun shining through the leaves of the moodboard, so I thought the sequins represented that quite well.

These are the products I have used for this layout:


Take part in the moodboard challenge using the Moodboard as inspiration for your project (and it can be any project as long as you use dusty attic chipboard), add your entry to the Dusty FANattics Facebook page and you could win one of two AUD $50 credits with Dusty Attic of their awesome chipboard pieces.

Take care,
Michelle


Thursday 3 February 2022

Back to Nature - Dusty Attic

Hi there,

I cannot believe it is February already - January certainly went by in a whizz! I have a nature layout on the blog today using some of the newer chipboard pieces.

These papers are from the Mintay Woodland Creatures collection. All my chipboard pieces were first painted with Dusty in Colour Pesto paint, and then brushed over with green and brown metallique waxes.
I first matted the photo with the layers of papers using 49 and Market Ephemera and adding in foam tape between the layers before adhering to the middle of the page. The old wooden fence (DA3081) was added between the layers of the papers. The larger of the Winter Corner chipboard (which is the branches and pine cone) DA3147, is added to the top right corner of the photo before layering the fussy cut flowers and leaves.
I then did the flower cluster in the left corner of the bottom of the photo and cutting the smaller Winter Corner tucking the branch piece up the side and the pine piece under the cluster.
I then finished off adding a cluster in the top left corner of the page and adding the definition "Happiness" from DA2997 on top of it.

These are the products I have used:


Thanks for visiting the blog today.

Take care,
Michelle