Monday, 30 May 2022

These are Treasured Memories

Hello from a chilly New Zealand

Hope you are all doing well - it has been a little cold here, winter is definitely creeping in. Perfect weather for staying indoors, keeping warm and scrapbooking. There is still time to enter the Dusty Attic moodboard challenge and your chance to win one of two AUD50 vouchers to use on Dusty Attic chipboard. Post your entry to the DustyFANattics facebook page under the moodboard post, using the moodboard and dusty attic chipboard for your project.

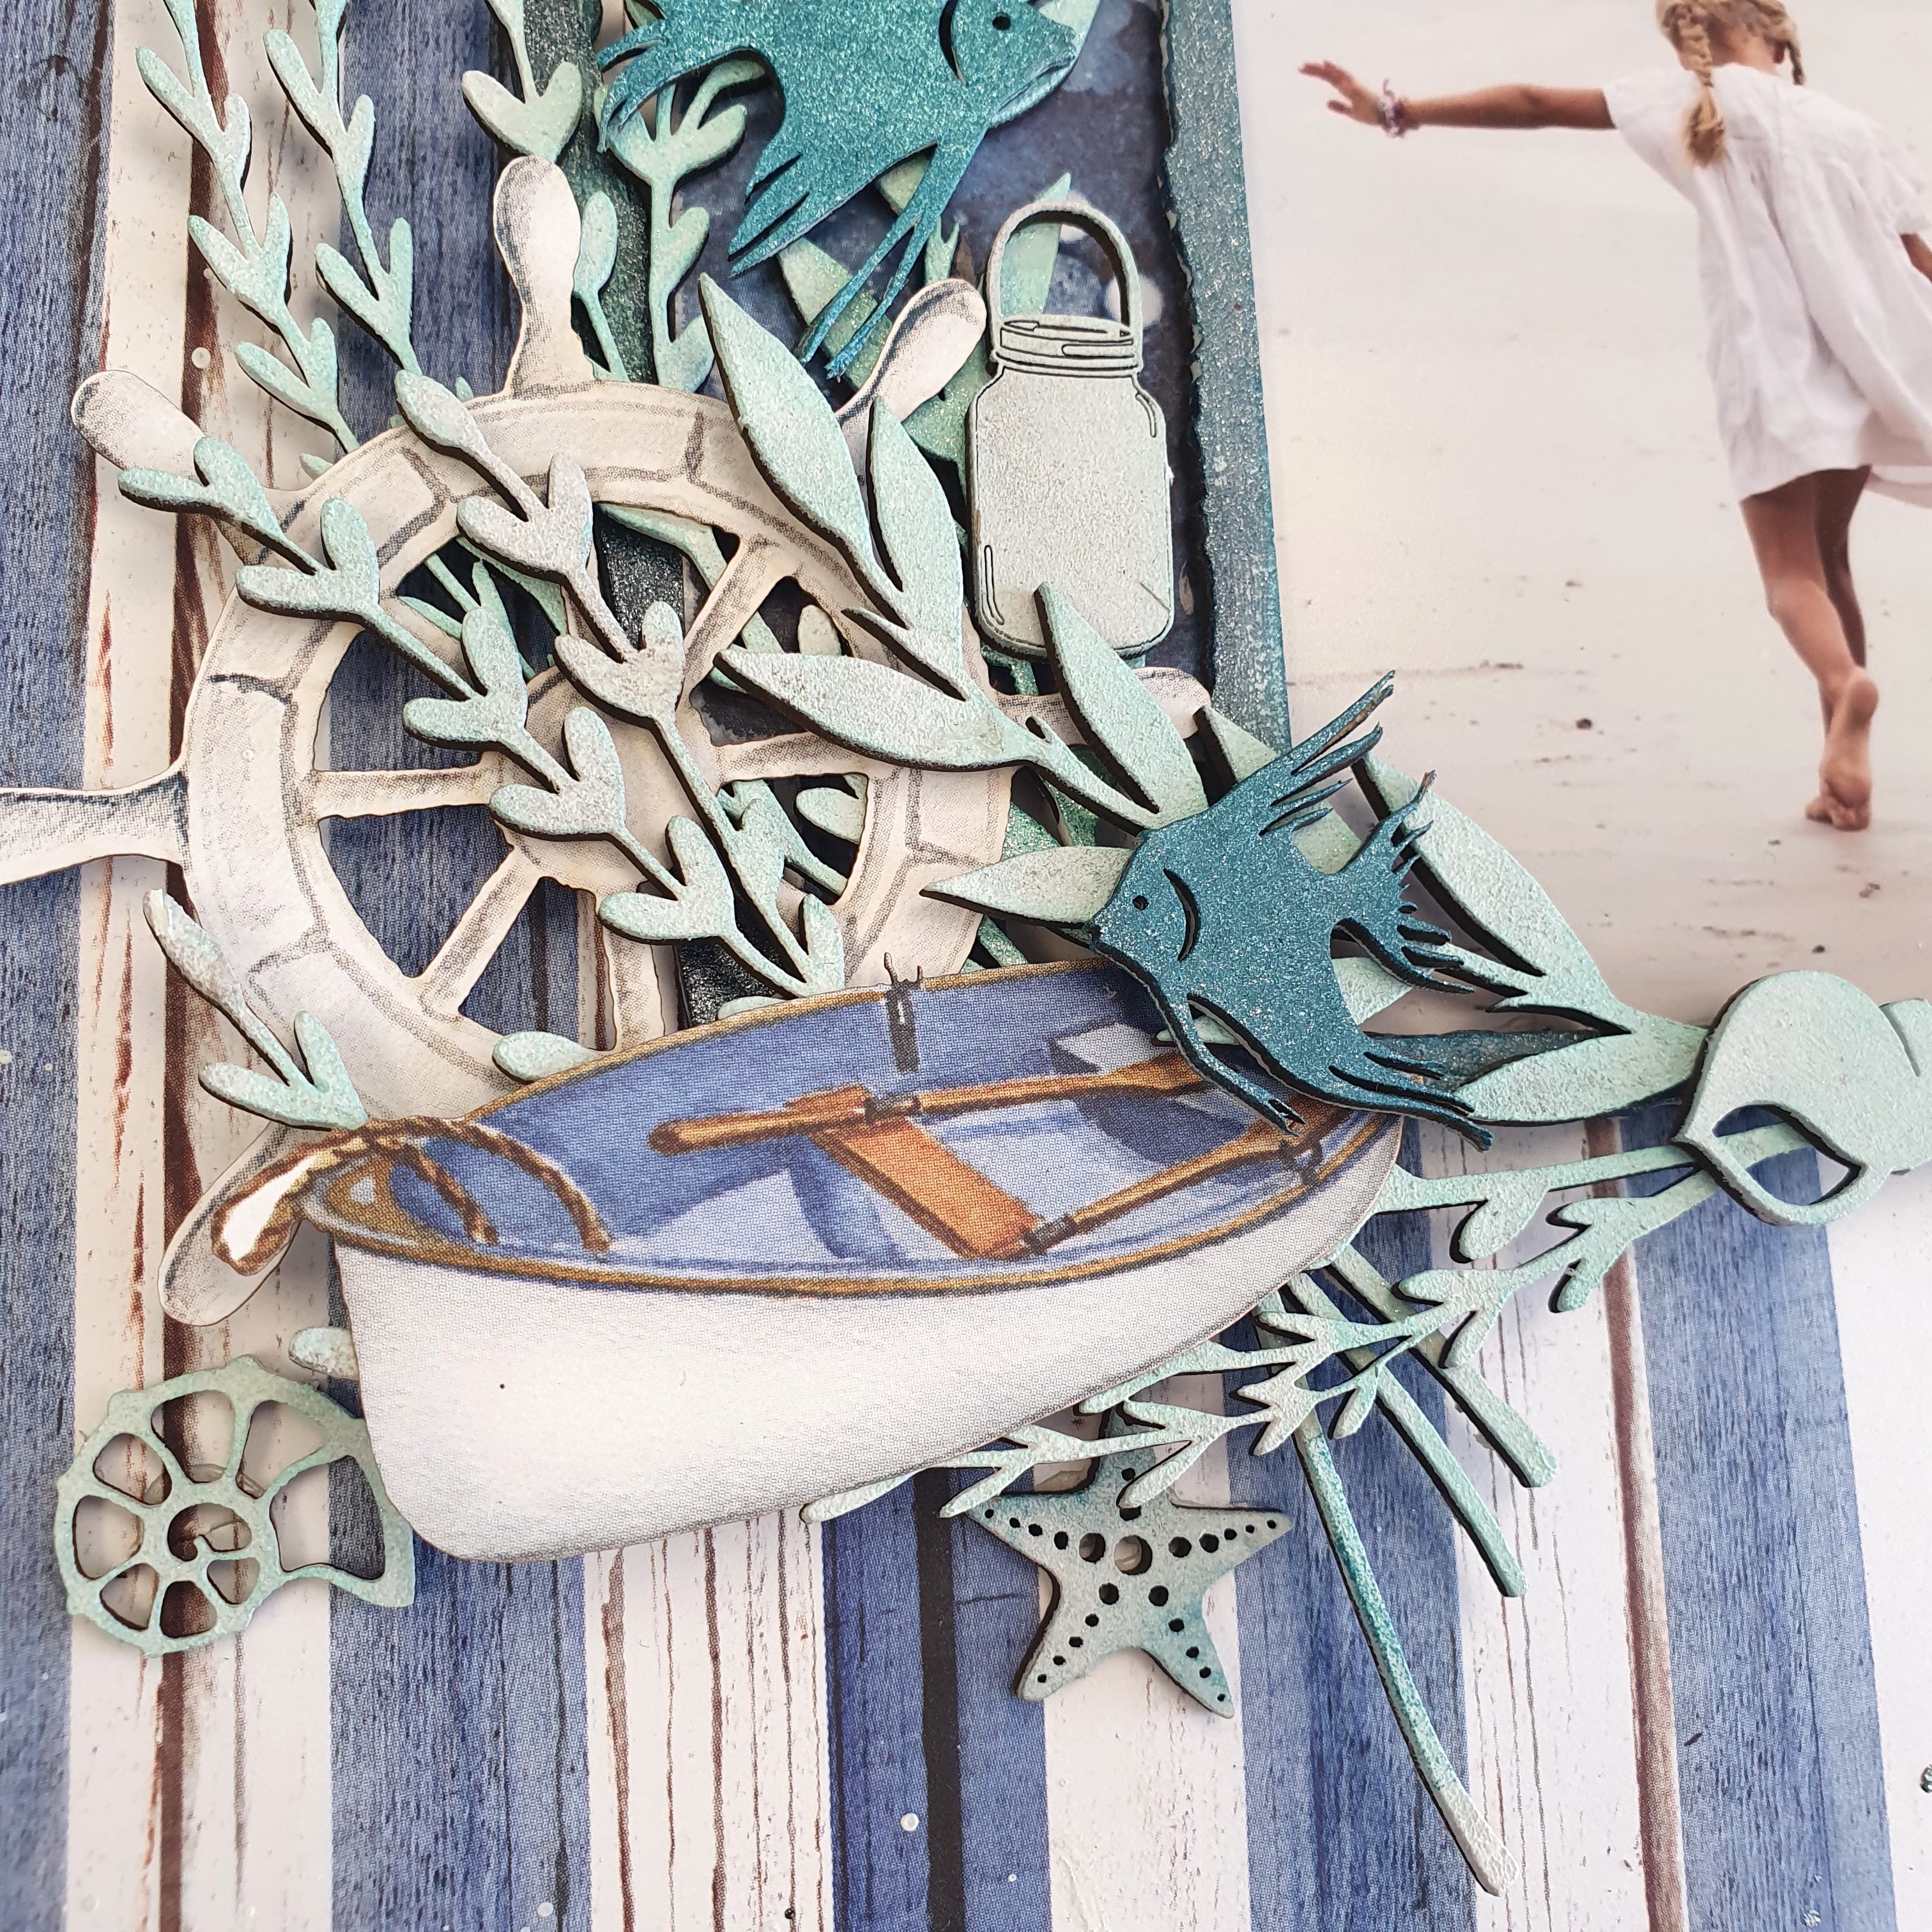
I have gone with the sea theme and created this layout
I have used a Mintay paper and cut out elements to make up my page. First paint all the chipboard (except the distressed frames DA2672), with either white acrylic paint or white gesso. When this is dry, edge the pieces with a dark blue ink stamp pad. I then lightly sanded each of the pieces. 
Cut the photo to fit the 4 x 4" frame. Frame is painted with blue metallic paint. Adhere the frame to the photo, then add the photo matt and then the outside frame to the page using foam tape.
I then added the one  piece foliage #15 DA2234 next to the photo, then added the ships helm and then adding the other piece of foliage. Layer the mini fish (DA2774), mason jar (DA1364) and mini shells (DA2267) around the cluster with the cut out boat.

I then added the title "These are treasured memories" (DA1842). I then splattered white paint over the page and added sequins to finish off.

These are the products I have used:


Take care,
Michelle


Thursday, 26 May 2022

Best Always Mini Album - 49 & Market

Hello friends

What a privilege to able to create a project with the new Spectrum Sherbet. I decided that I would make a mini album - as the range is just sooooo beautiful, bright and beautiful!


I have used a white envelope memory keepers foundation album to create this project, combined with the foundations pocket folio, 4x6 envelope folio, and the open waterfall folio set. I have cut down 12 x 12 collection papers to fit the album, using papers from the Sherbet Classics pack, the Foundations pack and the Solids pack cut to fit the album and the various flaps and envelopes. Each piece of paper added to the album has been sanded before adhering. The front of the album is made using the Flamingo Enchanted Petals flowers combined with laser cut pieces, chipboard titles and chipboard pieces. I have also added the Pallette's rubons down the edges of the album.
There are also pages where I have used the tidal wave and strawberry lemonade ephemera pieces as in the above photo - and underneath I have used the Spectrum Pallettes 4" fabric washi tape to finish off the edge of the page. There are also frames used out of the strawberry lemonade and tidal wave frame sets, combined with ephemera. (I have left a piece of the frames unglued to add photos in later). I have also used the strips from the bar code strip on the bottom of the page for the edges. 


Above photos show the waterfall and envelope folio. I have even used parts of the cover pages from each collection as part of my album.

Above shows how a full piece of the Pallette fabric tape can be used as a background. I have filled the pockets with the tags from the tag sets. The album is full of all the other elements - like the wishing bubbles, acetate leaves and mini index clips.

I have created a walk through video to show the album, and how the folio's are added and covered with all the different papers, washi tapes, rubons, tags, chipboard words and pieces. Click the link here.

Hope you have enjoyed this album as much as I enjoyed putting this together.

Till next time, 
Michelle


Wednesday, 11 May 2022

Choose Happiness - 49 & Market

Hello lovelies

I have created a layout using the Vintage Artistry Collectors Edition Volume 2 and some pieces from the Curators Botanical Collection.

I have being dying to use this photo of my daughter and her friend, in their yellow dressed and with the green bush in the background, thought this Vintage Artistry Collectors Edition Volume 2 and a little of Curators Botanical is just perfect! The background paper is from the Curators Botanical Solids collection pack - I have used paper 3. I cut out a square from the centre of this paper 3 so that I could use that purple to mat my photo. Next I used Paper 1 which I tore (more off the top than the bottom so as not lose any of the flower print) - make sure this wide enough to cover the piece cut out the centre of the purple paper. I cut my photo down to about 4"x 4" and used a frame from the laser cuts included in the VA Edition Volume 2 to adhere to my photo before adding this to my page with foam tape. I used the White Heron Rustic Bouquet flowers which I sprayed yellow using Lindy's Stamp Gang Flat Fabio Bonjour Butter, and while still wet, sprayed with a darker yellow spray - just here and there.
Once these were dry, I began layering my flowers and laser cuts from the VA Collectors Edition Volume 2.   Some of the bigger laser cut pieces were cut down so I could insert these with my cluster. 
The flowers and leaves were adhered using foam tape of varying thickness to create the dimension of a garden. 

I have used some of the rub-ons from the Curators Botanical 6x8 rub-ons sheets. These are the leaves at the top of the page and the flower at the bottom, as well as the script rub-ons that are added randomly to the page.
The title Choose Happiness - is off the laser cut sheets, and I used one of the other banner laser cuts as the matting - as the back of the laser cut sheet is lilac and was perfect to mat the title (which I have distressed). 
I finished off adding creamy coloured diamante to the page.

Thanks for visiting the blog today.

Take care,
Michelle


Tuesday, 3 May 2022

love you - Dusty Attic

Hello!

And just like that it is May! I seem to blink and it's a new month again ... Today I have a layout which has my whole heart on one page - albeit the photo was taken about 22 years ago. My husband, son and daughter ..... 

When we lived in South Africa, there was house that used have these small train engines that used to pull seats behind it, through other houses in our neighbourhood, and my kids (particularly my son) would love going on these. It was a great family outing. Here my husband is sitting with both kids in front of him and holding them as they were about to leave on their little trip. 

I have used a Mintay range of papers and ephemera to create my page. The Dusty Attic Chipboard used is DA2762 Mint leaves and DA3196 Mistletoe. These are painted with Art Alchemy Prima Metallic paint. 

I first sanded the edges of my photo and adhered this to the page with foam tape, so that I was able to to tuck my flowers and leaves under the photo all around it.
The edges of the Mistletoe pieces were edged off with Glossy Accents to give it a bubble-dimension effect.

Once I completed the layering, I added the letters "love you" using the same paint and the the "Fun Times" Alphabet set DA2698.

These are the products I have used:


Thanks for visiting the blog today.

Take care,
Michelle


Wednesday, 27 April 2022

Memories - Dusty Attic Moodboard April

Hello lovelies

As I type my blog, it is a warm day here in Christchurch, New Zealand. We are meant to be heading into winter, but one wouldn't think so with the warm weather.

Today I am on the blog with my moodboard project. 

When I see brown tones, I always think masculine, and I am such a sucker for cogs and gears when it comes to masculine pages, so yes that is the route I followed, using a photo of my very gorgeous son:
I have used selected cogs and gears from DA2859 and D2860, nuts and bolts (DA2880) and have used the word memories from the title DA0732, as well as geometrical panel DA1037. These were all painted with black gesso before I started my page.
While these were drying I sanded my photo, and adhered two pieces of paper behind the photo for my matting. Once the chipboard was dry, I added prima waxes on all the chipboard pieces. Mostly in tones of gold, copper and silvery colours.
I first cut down the geometric panel and adhered this to the page before adding my photo.
I added the photo with foam tape to allow me to tuck in the cogs under the photo. I then started layering the cogs, nuts and bolts.
Creating layers with the nuts and bolts also looks like they are part of the industrial look I am trying to create.
I then finished off with the title - the title is packaged as "happy memories" - and I have made use of just the memories part.

I finished off with adding some ink splatters.

These are the products I have used:


You can still take part in the moodboard challenge, by entering your take on the moodboard using Dusty Attic chipboard and submitting your entry to the DustyFANattics facebook page. And you could be one of two lucky winners to win a AUD50 worth of Dusty Attic chippy!

Take care,
Michelle


Tuesday, 26 April 2022

Delightful - 49 & Market

Hello lovelies

I have another layout created with the Avesta range.

The base of my layout is the Avesta Essence paper, creating the cluster within the circular pattern. I have done a fair amount of fussy cutting to create the cluster using Avesta Posies paper and the Avesta  Delight paper. I have cut various flowers and leaves from both these papers.  
The photo is framed with frames from the Avesta laser cut elements and then adding pieces from the Curators Essentials Remnants and Curators Essentials Laser Cuts - distressing the edges and added behind the photo before adding this to the centre of the page with foam tape. From here I built up the flower cluster with the fussy cut flowers and leaves and also adding darker flowers from the Ocean jade Royal Posies.
I have also added some tickets and the title "delightful" from the Avesta Ephemera bits pack. I have also tucked on some tags from the Avesta Tag set, using the "all my heart" title from the Avesta chipboard pack. Once the cluster was complete I added Avesta rubons from the 6x8 pack, under and around the cluster, as well as some off the 12x12 pack. 
I have finished off adding the script type rubons from the 6x8 rubon sheets. I love these as they are the "mixed media" without the mess - they are really effective.

Thanks for visiting the blog.

Take care,
Michelle