Saturday, 28 November 2020

Beauty - 49 and Market

Hello there,

I have created a layout using the Vintage Artistry in Colour Sage Collection with some roughly sewn rub-ons.

I have used the bonus page that is on the inside of the cover of the collection and the paper called Perennial. Inside cover page is the base and the reverse side of Perennial is cut down to 11" x 11" and the edges distressed. I love the Vintage Artistry Washi tape - and have used some of the Sage ones on this layout too. I have then used laser cuts from the Collection and some Vintage Artistry Sage ephemera layered behind the photo.  Roughly sewn rub-ons have been added. I created "paper tears" on the page and using the rub-ons looked like the tears were stitched.
Starting with the Garden Petals in Mint, I have used the bigger flowers and cut these in half tucked under the photo mat. I also cut up the laser cut leaves so these can be spread between the flower clusters. By cutting these, it adds extra to your pages. Then added some mint pixie petal flowers and fluff sugar posies to make up the rest of the clusters.

I have finished off adding a double bow in each cluster using the single ply jute.

Thanks for visiting the blog. Till next time,
Michelle


Sunday, 22 November 2020

Adore - Dusty Attic

 Hello Dusty Attic fans

Today I am up on the blog with a layout created with this month's moodboard. And what a beautiful moodboard it is!

Here is my take on the moodboard
I so loved working with these colours. First I started by matting my photo, then painted the Skeleton Clock (DA1689) with Dusty in Colour paint - Dusty Pink. The clock was then cut into 2/3 for the top of the photo and 1/3 for under the photo. From here I layered a number of flowers, including Dusty Attic Frangipanis (DA2534)
The Wattle Blossoms were cut apart and inserted among the flowers.
I love the mini titles pack (DA2575) - love how these have been cut with their curly ends - and have a few titles to choose from. 
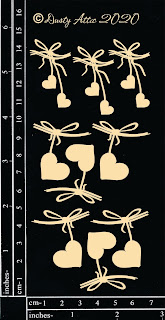
And then there are these adorable Heart Strings (DA2710) - which I have been dying to use - thought they were perfect for this layout. I have also cut the hearts off some of these  - so they could be used individually.

You can enter this months challenge using the moodboard, and post your entry to the Dusty Fanattics FB page https://www.facebook.com/groups/1949690068580466  - we would love to see your entry, and you get a chance to win $50 worth of gorgeous Dusty Attic chipboard.

Thanks for visiting the blog today.

Here are the products I have used:


Sunday, 15 November 2020

Treasure the moments that capture our heart - 49 and Market

Hello 49 and Market Fans

Thanks for popping over to the blog, and here I would like to show you a layout I have created using Vintage Artistry Collection, combined with a variety of flowers and Vintage Artistry Shore rub-ons.


The base page is the reverse side of Garden Notes. From there the photos were adhered to the frames off the laser cut sheet in the Vintage Artistry Butter collection. These frames were adhered to the page using some of the pieces from the Vintage Artistry Butter ephemera stack. 

Once these have been adhered, I have began to arrange the flower cluster using Maura's Vineyard Chardonnay stems, the lighter flowers from the Butterscotch Sugar petals , Cream Country Blooms and Lemon Drop Stargazers. These also included flowers, the clock and the butterflies from the laser cut sheet.

In the pack of Vintage Artistry Shore rub-ons there is a page that has a page with seaweed - but I wanted to show you how versatile these are and that by using them as foliage - and I thought these were quite effective. To finish off I have added some Fizz Wishing Bubbles

Take care,
Michelle


Thursday, 5 November 2020

Cheeky, Mischief - Dusty Attic

 Hello Dusty Attic fans

Welcome to a new month - cannot believe it is November already! For my November project today, I decided to do something a little different than I usually do and also to do a masculine layout. I have used some of the older Dusty Attic chipboard.

I loved the colours of this Coco Vanilla "Boys Rule" paper and so decided that I would paint my chipboard to match. I started with adding some stencilling to the background using the Distressed Grid Stencil, and then randomly stamped over the stencilling with a script stamp.
Using one of the cog frames from the Cog Frame set, I cut the top part of it off, and added the smaller bit to the right and the bigger piece to left. 

Chicken wire was added and the matted photo then added. I have then painted the cogs in a mix of blues and greens.

Cogs were also added to the small side feature
The titles were then added once the cogs had been added

These are the products I have used


Thank you for visiting the blog

Cheers,
Michelle