Thursday, 25 July 2019

Selfie - Dusty Attic

Hello Dusty Attic Fans

Today I am on the Dusty Attic blog featuring my layout for the July moodboard. I have done my layout of my daughter who was trying to teach me how to do selfies. I couldn't get my pose right, so she took my phone and said "here Mom like this, and this was the photo she took as a selfie on my phone 😋.

And here is my layout featuring these gorgeous colours:

This is a Stamperia set of papers. I have started by colouring the Mystic Frame in a mixture of Dusty in Attic acrylic paint Denim and Capri and sponging this on the chipboard, as well as the leaves, and the keys. I the made a shaker box before adhering the flowers. I then mounted the photo on layered papers, distressing it and adhering it to the page with foam tape, before adhering the the Mystic Frame on top of the photo
I layered the flowers and added the leaves in under the flower arrangement
I have added in some little keys, I think these are quite cute!
I then painted the script chippie with Dusty in Colour gold paint, I then cut this up and stuck this behind either side of the photo and another bit at the end of the flower cluster on the left.


I have finished off by dabbing both a mixture of Dusty in Colour Raisin paint and some Capri on the title "Selfie"


Thank you for visiting the Dusty Attic blog today. And why not take part in the Moodboard challenge, for your chance to win a $50 voucher. Perfect, as Dusty Attic have just released their new range for 2019!

Products used

Have a lovely day, and see you soon!

Michelle

Tuesday, 23 July 2019

49 and Market - Captured

Hello there!

I am so loving the new range of flowers, and today I am going to show case some of the new flowers using a mixture of other gorgeous 49 and Market products. Here is my layout for today using Bold and Beautiful Garden Letters paper:

Using the Vintage Remnants Laser Cut sheet no 1, adhere the photo to the frame. Add the postcard from Bold and the Beautiful Laser Cut Sheet, and then the postcard from the Vintage Remnants Laser cut no 1 behind the photo and then adhere to the page on foam tape. Tuck the chicken wire behind the photo and the postcard on the right.
3D the flowers from the Bold and Beautiful Laser Cut Sheets, and then start layering the flowers. I first started by making a triple bow from the single ply Jute Cording Single, adding it to a piece of foam tape before adhering the first flower in the left corner.
The flower cluster is a mix of the flowers and the 3D flowers from the  the Bold and Beautiful Laser Sheet, the Scarlet mini series flowers, the Tangerine wildflowers, and some of the Tangerine country blooms. I have also used all the leaves from the Bold and Beautiful Laser Cut sheet, as well as some of the stamps.
I have broken up the Tangerine wildflowers, and layered these through the flower arrangement. I have tucked the lace chippie from the Treasure archival board under the flowers, and have randomly added the cogs from the Great Outdoors archival chipboard through the flowers. I have also cut up the chicken wire and added this in. There is also some of the leaves from the new Ethereal Layered Embellishments.
I have then finished off with adding a mixture of art stones
 Pop over to the 49 and Market blog for details on all the gorgeous products I have used.


Thanks for visiting my blog today! 


Sunday, 7 July 2019

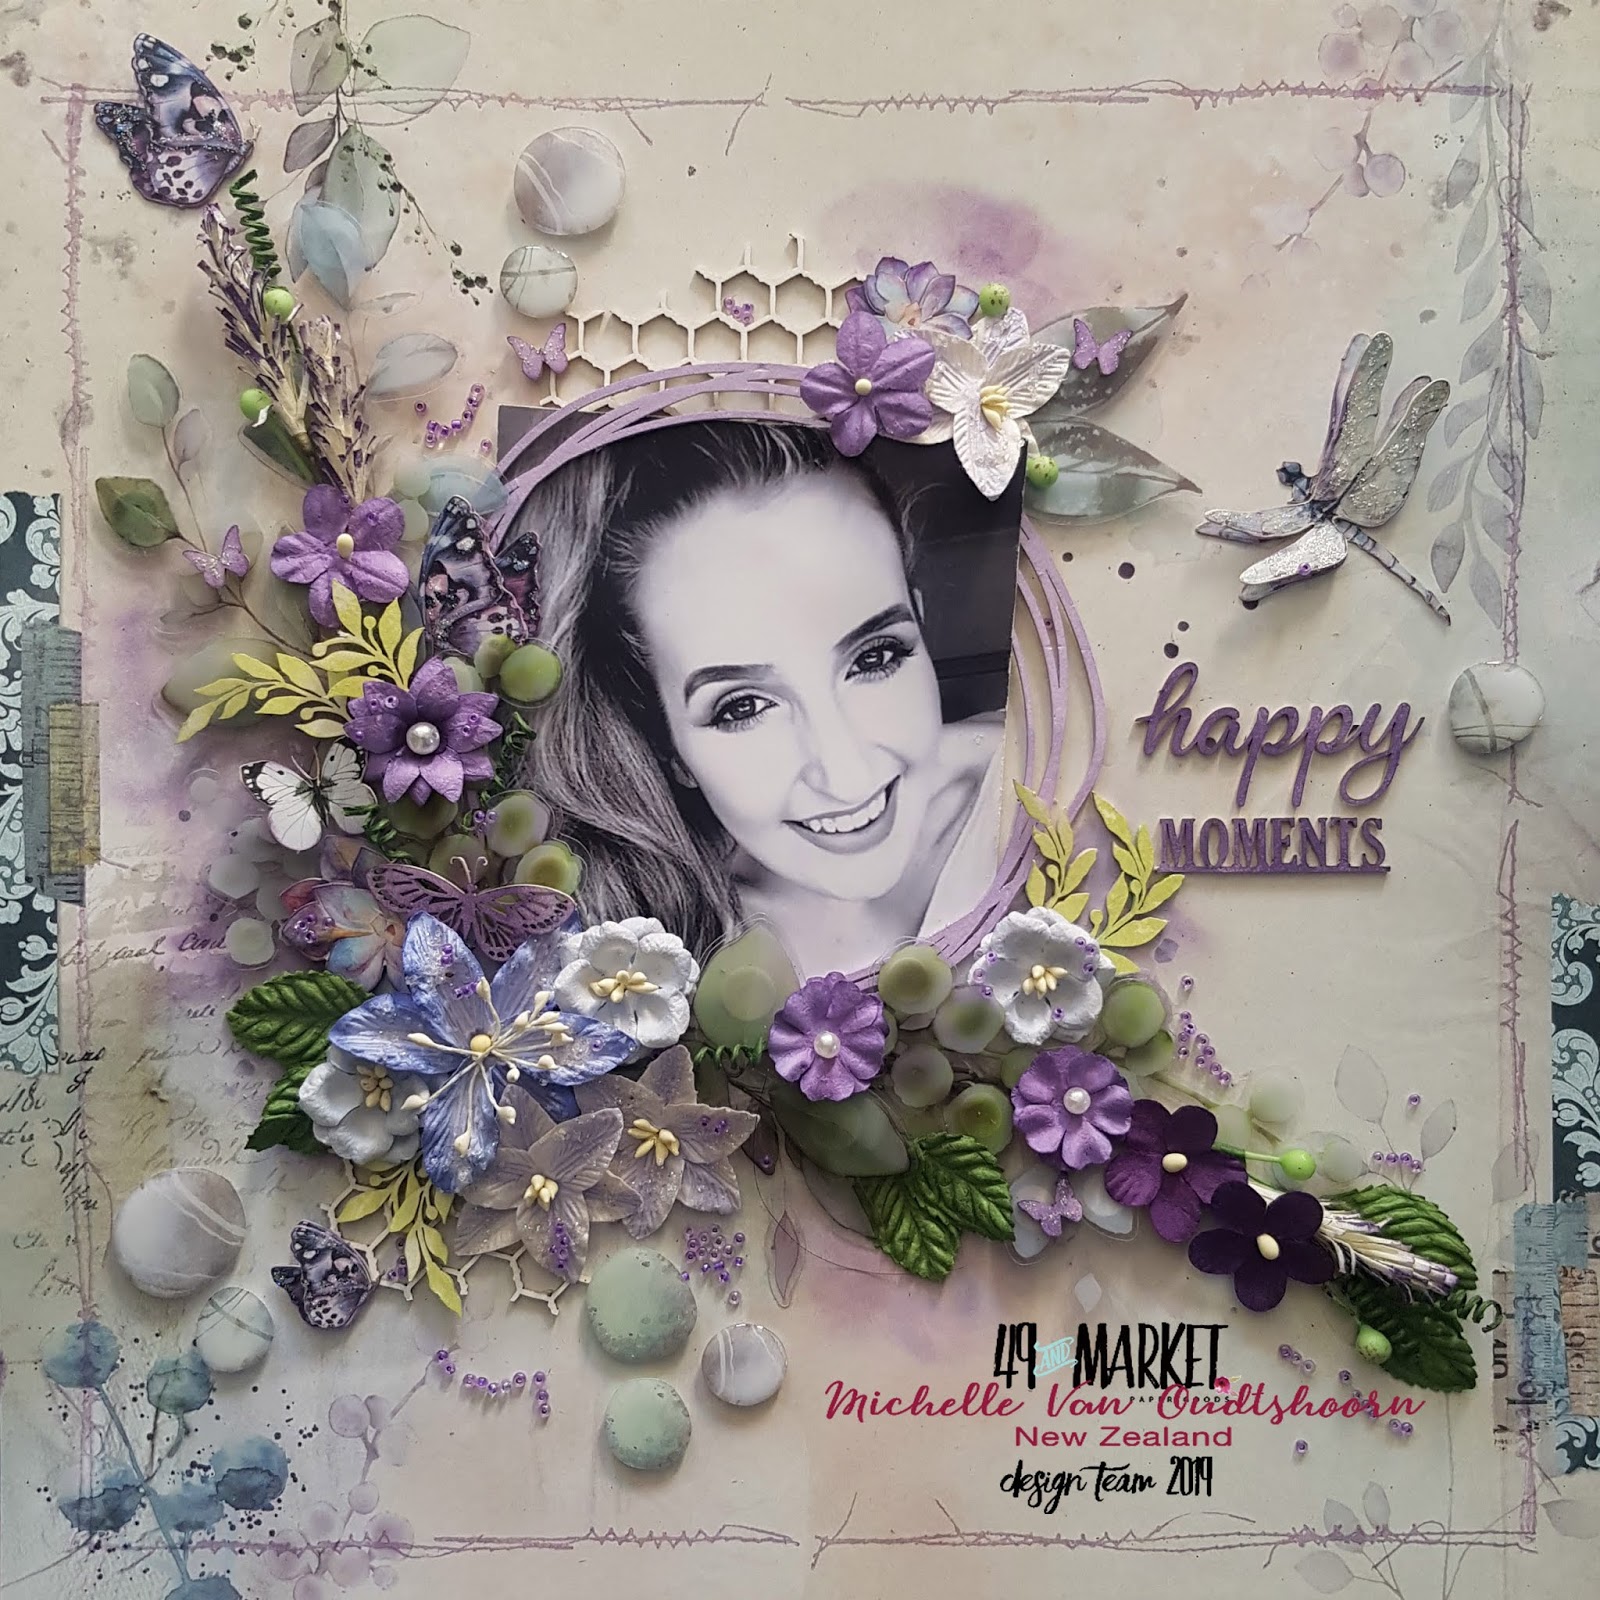
Happy Moments - 49 and Market

Hello 49 and Market fans

I am so thrilled to be able to showcase the lovely new layered embellishments 49 and Market have released. These are nothing short of stunning! They are beautifully layered 3D embellishments, that really pop on a page. Here is my layout featuring my gorgeous daughter, with the Serendipitous layered embellishments and some of the newly released flowers too

The base page is Serendipitous After the Rain paper, and stamped around the page with Gabi's Line stitch Stamp Set. I then coloured and used all the pieces from the Archival Chipboard "happy Moments". I inserted the photo in the circular frame and lifted it on foam tape. I then started with the large flower from the Stargazers-Periwinkle and layered the other flowers and the leaves from the layered embellishments.
 I actually broke up the leaves and the seeds as well as the wired spirals from the Stargazers-Periwinkle flower set, which I inserted as I layered. I then added other flowers and pieces from the Mini series Flowers set (violet) and the Wildflowers (violet).
 
 I then layered the butterflies and the dragonfly from the Serendipitous laser cut sheet and added these on the layout, adding some stickles to the wings. I finished off with adding some beads on the layout and dash of violet ink around some of the flowers.
So love these beautiful colours!

These are the products I have used:


Till next time, happy crafting lovelies!


Tuesday, 25 June 2019

Breathtaking Dusty Attic

Hello lovelies

Hope you are all well, and enjoying the weather in your part of the world. It is cold and wintery in New Zealand - perfect scrapbooking weather! Here is my layout featuring lots of gorgeous Dusty Attic products:

I have used a Stamperia Provence paper and matching cardstock for my layout. I have started by tearing and inking the edges  of the white Stamperia paper. I then added clear gesso. Once this was dry I stenciled in some stars with texture paste using the Dusty Attic Starry Night stencil.
And then stamping with a dark grey archival ink in a circular shape around the page. The Dusty Attic Baroque frame is painted with Dusty Attic Sugar Plum paint, and a dusting of Prefect Pearls to give it a slight shimmer. I have done all the ivy leaves in white paint, and then added Creative Expressions Opal polish in lavender and green over this and then added some Stickles.

I have used the Ivy flourish as the base at the bottom of the Baroque frame and then cut ivy pieces from the Ivy Corners to expand the ivy leaf chipboard cluster.
Once done I have added an older range of 49 and Market flowers in clusters, including the key and dragonfly's from the 49 and Market Archival Chipboard collection.
 The Breathtaking title has been painted with Dusty Attic Lavender Blush and also dabbed with a little lavender Perfect Pearls.
The layout has been finished off with dotting some pearls on the layout.

Thank you for visiting the blog!

Here are the products I have used - click on the product code which take you to the online website:


Sunday, 23 June 2019

Memories to Last a Lifetime - 49 and Market

Hello 49 and Market Fans

Today I am here to show you my latest layout as DT for 49 and Market. I have created a layout using the new "Old School Collection" - it is a great collection, and I have decided to showcase this collection using a heritage theme.
I love the brown and blue tones of this collection. I started off with the paper called Penmanship. I first prepared the page with clear gesso. Once dry, I added some texture to the page with texture paste and a script stencil. This was then stamped with various stamps using dark blue, dark brown and black archival inks.

I have used frames from the Old School Collection pack and the laser cut frames and from the Vintage Remnant's pack no 3 and layered these behind the photo. Then using a mixture of mostly navy and some of the lighter yellow botanical potpourri flowers, combined with laser cuts from the Old School Collection, I created the flower cluster. The little booklets are just adorable - these can be created in 3-D.
I have also used the Archival Chipboard Treasure  as elements on my page. The script has been cut in half so that I could tuck it in under the laser book and the right hand side of the photo. I then also cut the lace strip to add between the flowers and under the the photo.
I have then used some of the leaves and the dragon fly from the Serendipitous Laser Cut Sheets and the bottles, clock, books and pens from the Old School laser cut sheet
I have then finished off with adding some muslin cloth and arts stones, and stitching around the edge of the page.


Thanks for popping over and visiting my blog :)


Saturday, 15 June 2019

Days like these are what makes life sweet - Dusty Attic

Hello lovelies

Today I am up on the Dusty Attic blog with my take on the lovely June Moodboard.
I just love the calmness and the goldenness of this moodboard,  So calm and picturesque, so I have taken to using the golden features of the picture to create my layout. 

 I have started with using a 49 and Market paper from the Captured Adventure collection - using the page named Vagary. The page was primed with clear gesso, then stencilled with the moulding paste and the Dusty Attic Fishnet #2 stencil.
The page was then altered using various shades of perfect pearls, and then stamped with a script stamp. I then coloured my Dusty Attic drift wood chipboard with various shades of Luminarte pigment powders.
I have also used the same pigment powders on my flowers
I then layered the flowers and the driftwood chipboard in my cluster and adding in some laser cut shapes from the laser cut sheet from the Ethereal range.
The frame is the piece that holds the two frames of the Fleur de Lis Frame chipboard. And then finished off adding a gorgeous industrial dragonfly and then adding some prills.
Photo complements of Pexels.com

These are the Dusty Attic products I have used:

Pop on over to the Dusty Attic blog and take part in the moodboard challenge - and your chance to win a $50 voucher from Dusty Attic.

Take care,
Michelle