Sunday, 26 March 2023

Remember this moment always - 49 and Market


Hello lovelies

I have a layout created using the Color Swatch Eucalyptus range and some bits from the Vintage Artistry Tranquility range.

The base of the layout is the bonus sheet from the Color Swatch Eucalyptus paper range. From there I matted the photo with a mix of layered Eucalyptus frame sets (edges were distressed) followed with lasercut pieces and Vintage Artistry Tranquility ephemera. This was all added with a foam tape to the centre of the page so I could still add flowers, rubons and other lasercut pieces underneath.


I also added the two Eucalyptus doily lasercuts.

From here I added Vintage Artistry Tranquility rubons from the 12x12 transfer page around the matt, as well as adding the Eucalyptus acetate filmstrips.

I then started with the flower cluster on the left using Nature's Bounty Taffy flowers (new release) and Florets Taffy (also a new release) - mixed in with leaves and flower bits from the Eucalyptus laser cuts and the Tranquility ephemera. 

I broke some of the flowers apart and also made a flower cluster on the right adding on the dragonfly and butterfly from the Eucalyptus lasercuts. To the top right and bottom left corners, I added the 3 butterflies from the Tranquility rubon 12x12 transfers and cut these in half before adding to either side of the page.

I finished off adding the title "remember this moment always" from the Eucalyptus lasercut sheet, adding some of the rubon splotches from the Tranquility rubon sheet, as well as tearing a v-section at the top of the page adding the word piece "look at you" also from the Eucalytpus lasercuts and the adding the pink tickets from the Tranquility ephemera pack into the "v".


Thank you for visiting the blog :)

Hugs,
Michelle

Saturday, 11 March 2023

Sweet - 49 and Market

Hi there.

I am soooo loving this beautiful Vintage Artistry Tranquility collection - such pretty, soft colours. 

When I saw the Tranquility laser cut flowers, I just knew I needed to use these on my layout. The base of the layout is done with the Bravado paper from the 12x12 collection pack. The photo was matted onto cards from the Ephemera pack and then adhered to the paper with foam tape to the centre of the matt - this would allow me to add the laser cut flowers under the photo matt with foam tape and then create the flower cluster around the photo.
I started with the bigger pieces to each side of the photo and then added the single flowers and leaves and built up the flower frame - using foam tape to create dimension

I love the long bubble flowers and the single stems, these were all added to hang out and down also with foam tape.
In among the cluster, I have also added chipboard pieces and a ticket from the Eucalyptus Ticket Essentials pack. The lace doily is from the laser cut elements and I cut this in half and added one part at the top and the other part at the bottom.
I also added rub-ons to the Bravado paper - around the photo and and the edges of the paper. I have also added strips of Tranquility washi tape to the top and bottom of the paper.

I finished off adding the chipboard title "Sweet" and some crystal beads.

Thanks for visiting the blog today.

Hugs,
Michelle


https://www.49andmarket.com/product/vintage-artistry-tranquility-12x12-collection-paper-pack/
https://www.49andmarket.com/product/vintage-artistry-tranquility-bravado/
https://www.49andmarket.com/product/vintage-artistry-tranquility-6x8-rub-on-transfer-set/
https://www.49andmarket.com/product/vintage-artistry-tranquility-laser-cut-elements/
https://www.49andmarket.com/product/vintage-artistry-tranquility-laser-cut-wildflowers/
https://www.49andmarket.com/product/vintage-artistry-tranquility-ephemera-bits/
https://www.49andmarket.com/product/vintage-artistry-tranquility-chipboard-words/
https://www.49andmarket.com/product/vintage-artistry-tranquility-washi-assortment-set/
https://www.49andmarket.com/product/color-swatch-eucalyptus-ticket-essentials/


Friday, 3 March 2023

Todays Memories are Tomorrow's Treasures

Hello lovelies

Well here we are in March already, can you believe it? Here is my layout for this month: 

I have started with two papers, tearing one down top and bottom before adhering to the page. I then add the photo with foam tape, before adding all the fussy cut pieces under it.
I have used DA0335 mini scroll as flourishes - there are two in the pack. These were painted with metallique acrylic paint and then tucked under the fussy cut elements. I then dry brushed a tinged of rusty coloured paint over the chipboard pieces.

The Mini Foliage #2 DA2786 comes with a variety of different shaped mini leaves - and I have used the oak leaves and added these under the laser cut elements - painted with the same acrylic paints, lightly sponged on so as not to lose the veins in the leaves.
The title "Today's Memories are Tomorrow's Treasures" was also lightly sponged with paint so as not to fill the letters with paint, and added to the photo with foam tape.

These are the products I have used:


Thanks for visiting the blog today.

Hugs,
Michelle


Sunday, 26 February 2023

Moments to Treasure - 49 and Market

Hi there,

I am so excited to be able to play with the new ARToptions Rouge collection. So many beautiful elements to create with ...... 

The base of my layout is the reverse side of the ARToptions Rouge Sugar Babies from 12x12 ARToptions Rouge collection paper pack. I added washitape to the top and bottom of the page. The envelopes for the photos are from the ARToptions file essentials. The photos were matted on elements from the ARToptions Rouge Cluster kit. I then used another element from the essentials file pack as the 2nd matt before adhering the envelope matts to the page with foam tape, so that I was able to tuck laser cuts under the envelopes and matted photos. The "paperclips" are from the Washitape stickers (a new eddition to the washitape range - and a new firm favourite for me!) I added a large flower lasercut from the Wildflowers laser cut pack to the bottom of the envelopes/photos, and then layered some flowers in the centre adding a lasercut ribbon from the lasercut elements pack. I also created a flower cluster to the left of the first envelope, adding some rubons (6x8 pack) and some washi tape stickers on the envelope - the leaves under the lasercut flowers are also the washi tape stickers. The stamp is also from the lasercuts elements pack.

The xoxo on the heart is also a washitape sticker.
I created another flower cluster to the right of the 2nd envelope also with wildflower and elements lasercuts, plus I added some rubons and washitape stickers.
A flower cluster was created at the top of the page - I cut one of the flower clusters in half from the wildflowers pack and adhered this to the page with foam tape, adding some more wildflower lasercuts and the titles from the chipboard set.
Once  I had completed adhering everything, I then used some of the rubons from the 6x8 rubon pack and added these around the photo, also created a rubon cluster at the top left and adding the lasercut moths and butterflies, with foam under the wings to add dimension. The title Moments to Treasure is the name strip at the bottom of the page which I added over the flowers.

Thanks for visiting the blog today.

Hugs,
Michelle


Saturday, 18 February 2023

Beautiful - Dusty Attic

Hello Dusty FANattics

I am sharing a layout inspired off the colours of the February moodboard

This is the layout I created with the moodboard
This layout has been created with Mintay paper range. I started with the ornate pendant (DA1366) and first cut of the chain part of the pendant, which I coloured with a Posco blue pen and the rest of pendant with a Posco pink pen. First I matted the photo, and then created the flower clusters - all added with foam tape and added the chain cut pieces to the photo.

The leaves (DA0508) were painted with a mix of blue, pink and purple posco pens and tucked under the flower clusters.
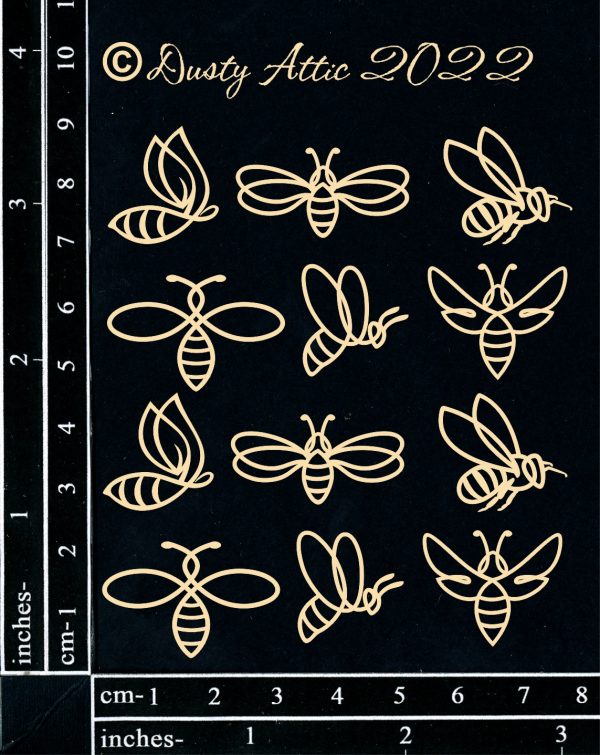
Love the cute little bees (DA3314) - also using the Posco acrylic pens to colour the bees and added to the flower clusters 
The hashtag title "beautiful" (DA1597) was added to the layout, and I then added some bling to the page,
Why not enter the moodboard challenge by using the moodboard as inspiration, using dusty attic chipboard on your project and enter your project on the Dusty FANattics Facebook page and you could win one of two AUD$50 worth of  gorgeous Dusty Attic chipboard.

These are the Dusty Attic products I have used:


Saturday, 11 February 2023

You're the Best - 49 and Market

Hello there :)

I just can't get enough of this Vintage Artistry Serenity Collection, so I created another layout using these fabulous products. Here is my layout:


I have used the Vintage Artistry Serenity Brief Glimpse paper out of the 12x12 collection pack. The photo is then matted onto the Serenity Solids no 3 paper from the 12x12 Vintage Artistry Serenity Solids collection pack. Behind this I have added distressed layers of pieces from the Serenity Ephemera and Serenity Remnants pack. I also cut a banner strip from the Serenity paper called Fluttering Trio and added this behind the matted papers. I also cut a ticket in half and created banners points and added this next to the paper banner. Plus I cut a paper "frame"in half (from the laser cut pieces) and added these in the flower cluster and at the corner of the banners. 
I fussy cut leaves from the bonus paper of the Serenity collection pack - which is on the reverse side of the cover paper in the pack. I have layered these, with laser cut flowers and tickets. The bow is made from the Single Ply Jute Cording, making a triple bow, adding this to the flower and leaf cluster, and add on the chipboard title "You're the Best"
I have added bits of rub-ons (butterflies and splotches, as well as foliage) from the 6x8 rub-on transfers pack - the wording "loved" comes from the 12x12 Serenity Sentiments Rub-on pack. 
I have also added butterflies - these I have given a dimensional effect - by adding glue down the centre of the body, and foam tape to the wings, close to the body. The closer the foam tape is added to the body, the more the wings will raise off the page.
I finished off the layout adding little bits out of the Ephemera pack, like the heart buttons, some wording and the frame.

Thanks for popping over to see the blog today. I will be back later in February, featuring a layout created using one of the new collections recently released.

Till then,
Michelle

https://www.49andmarket.com/product/vintage-artistry-serenity-12x12-collection-pack/

https://www.49andmarket.com/product/vintage-artistry-serenity-brief-glimpse/

https://www.49andmarket.com/product/vintage-artistry-serenity-solids-12x12-collection-pack/

https://www.49andmarket.com/product/serenity-solids-paper-3/

https://www.49andmarket.com/product/vintage-artistry-serenity-fluttering-trio/

https://www.49andmarket.com/product/vintage-artistry-serenity-laser-cut-outs/

https://www.49andmarket.com/product/vintage-artistry-serenity-ephemera-bits/

https://www.49andmarket.com/product/vintage-artistry-serenity-remnants-pack/

https://www.49andmarket.com/product/vintage-artistry-serenity-chipboard-bits/

https://www.49andmarket.com/product/vintage-artistry-serenity-12x12-sentiments-rub-on-transfer-sheet/

https://www.49andmarket.com/product/jute-cording-single-ply/

https://www.49andmarket.com/product/vintage-artistry-serenity-6x8-rub-on-transfer-set/


Friday, 3 February 2023

Moments in Time - Dusty Attic

Hello lovelies

I have a layout created with a Stamperia range of papers and embellishments that I would like to share with you today.

I have used a wooden frame DA3017, painted with a metallique acrylic paint. I have adhered the frame to the photo and have used the smaller frame painted in the same paint, cut in half an adhered to the middle of the left side of the page. I have used one of the frames from the Get Framed Rectangles (DA2374)which I have cut and added under the larger frame, before layering the flower die cuts.
The same flower cluster arrangement has been added to the smaller frame on the left 
The flower clusters are done with foam tape to add dimension, and this allowed me add the leaves from DA0508 pack under and among the flowers.
The title is actually "precious moments in time" (DA2553). I had used the word precious for another project, and therefore was only left with the moments in time - which I used for this layout. This is a way to show that on piece can be used in different ways.

These are the products I have used


Thanks for visiting the blog today

Hugs,
Michelle