Friday, 28 February 2020

Beauty - 49 & Market

Hello 49 & Market fans

I have had such fun creating my layout today - lots and lots of layers with the laser cuts from the new collection Vintage in Artistry Color Sage.
I have used the reverse side of the Echoes paper as my base and then torn the paper Delicate and using the flower side of the paper adhered this to the base page. Then using the laser cut shapes from the Sage mini collection, I started layering these. The frame on the photo is adhered with foam tape . I glued on the laser cut shapes to the photo first and layered as I went before I adhered the layers to the page. Before I adhered this, I gauged where this would be placed and then stamped with the Ticket Express stamp on the page.
The stamping can be seen just on the outside of your layered piece. I then also stamped darker images of the "ticket" from the Snapshots of Yesterday Stamp Set. I also used the "M" moments stamp to stamp on the tag below the photo from the same stamp set.
I have added some washi tape to the edges of the layout - and I have also added some Vintage in Artistry Sage Washi tape . These are absolutely amazing - the strips are all adhered to acetate, so easy to peel off, and cut as needed. I have also added some washi tape to some of the tags. The butterfly has been stamped using the Gratitude Today Stamp Set.
The laser shape where the twine is tied has the holes already pre-cut and was then easy to add the single ply jute to make a bow.
I have finished off randomly placing the bubbles from the Eucalyptus Dreams Layered Embellishments pack.

Thank you for visiting, and I hope you enjoy using this new Vintage in Artistry Color Sage collection as much as I did.


Thursday, 13 February 2020

Dreams - 49 and Market

Hello 49 and Market friends

Today I have created a layout using one of the new collections "Irrevocable Beauty" - it is a really beautiful collection of stunning papers and laser cut pack full of gorgeous laser cut shapes.

Start with the Courier page, and cut out the frame, and cut out around the corner feature leaving the flowers and the post box. The frame is then mounted on to the Romanticism paper with foam tape so that it has the dimension of a frame. Using flowers from the laser cut sheet and some leaves from the Eucalyptus Dreams layered embellishments, I have layered these up and an around the post box. On this laser cut sheet are the cutest bees - and I have added a bee on foam tape here.

I have used frames from the laser cut sheet for the photograph (photo compliments of Pexels.com), including adding some pieces from the Vintage Artistry Natural Collage Stack. I have also cut the "tape" pieces from the fussy cut element sheet found exclusively in the 12x12 collection pack. I have also cut the green post box from this same sheet featured in the top arrangement.
There are also some flowers and a butterfly from the Eucalyptus Dreams layered embellishments added to the laser cuts cluster.

Thanks for visiting. Till next time!


https://www.49andmarket.com/product/irrevocable-beauty-courier/
https://www.49andmarket.com/product/irrevocable-beauty-romanticism/
https://www.49andmarket.com/product/irrevocable-beauty-laser-cut-shapes/
https://www.49andmarket.com/product/eucalyptus-dreams-layered-embellishments/
https://www.49andmarket.com/product/vintage-artistry-natural-collage-stack/
https://www.49andmarket.com/product/irrevocable-beauty-12x12-collection-pack/


Sunday, 9 February 2020

Family Matters - Dusty Attic

Hello scrappy friends

I just love the colours in this months moodboard  -  so soft and delicate.
Here is my take on this beautiful moodboard
I have used 49 and Market paper from the Captured Adventures collection. I have cut various pieces of paper to matt behind the photo and adhered this to the base paper with mounting foam - only attaching in the middle so I was able to stamp around the photo once I had adhered it. I then painted very lightly around the photo and over the stamping with some Dusty in Colour light denim paint. The Broken Bits Distressed Grid pieces were painted with Dusty in Colour Light Denim and adhered under the corner of the photo matt to the top left, bottom right corner and for the arrangement at the top right corner.
I have then used 49 and Market Sky wildflowers arranged around the photo. The mini starfish, shell and compass have been painted with a dusty rose colour paint and placed among the flowers. The foliage has been painted in an eggshell colour. I have cut these up and placed among the flowers. The polaroid frame has been painted and tucked under the photo, and I used the small inside frame for the arrangement at the top right corner.

Once all the pieces have been adhered I then used some dusty rose coloured pastel/powder and dabbed some pink around the edge of the photo/flower arrangements and then added some glass micro beads to finish off.

These are the chipboard pieces I have used:


Tuesday, 4 February 2020

Dream - Dusty Attic

Hello Dusty Attic fans!

It is February already - gosh time flies and they usually say time flies when you are having fun, right? I certainly had lots of fun putting my layout together.
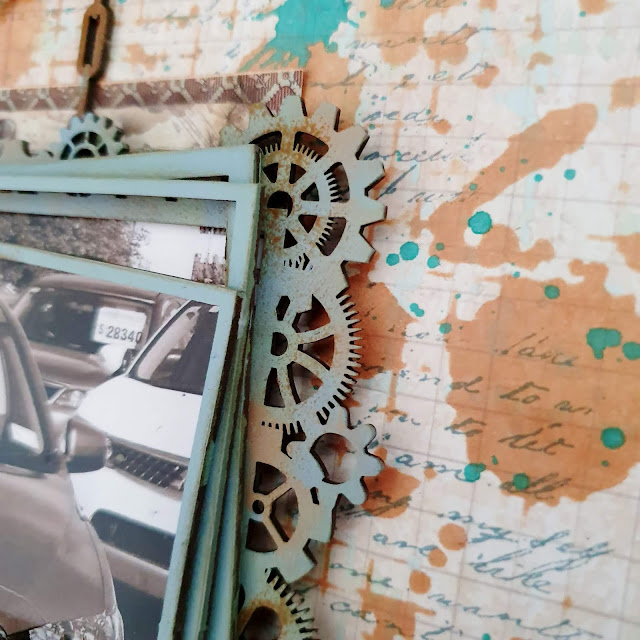
This is a layout of my son, who bought a brand new car for himself a couple of years ago - hence the "dream" theme. Of course this is a photo moment - rare too, as he detests the camera. I don't have many photos to scrap of him, so this is a good opportunity! I have used the Timeless Stamperia paper to create the layout. I have started with stenciling the background using the Dusty Attic Distressed Grid stencil (DA1538) and a Tim Holtz ink with a blending tool. I then stamped with a script stamp over the stenciling, and then added some ink splatters in teal. I have then taken one of the frames from the Notepad Edge Frame (DA1572), painted this with dark brown paint and adhered this to the page.
The cogs have (DA2370) been painted in brown, and then dry brushed with a teal coloured paint to look rusty. The rectangular frames (DA2374) are layered, and there is also a cog frame (DA2369) around the frame - these are painted in blue/teal - and dry brushed with brown, same as the cog clock (DA1749).  Add the spark plugs  (DA1152) to the frame.
I have added some chains and and the title (chains, nuts and bolts come from DA2122) and the title from the Blueprint Word Pack (DA2225). The chains have been cut so added to the top and the bottom to look like it running under the photo.

These are the products I have used:


Thanks for stopping by,
Michelle