Monday, 25 November 2019

Absolutely Beautiful - Dusty Attic

Hello Dusty Attic fans

"The Eyes are the window to your soul"
I have this really gorgeous photo of my daughter's eyes - and I have created a layout for the blog today with this photo
My daughter is a make-up artist, and I love how she has done up her eyes. I have therefore used a circular frame to accentuate her eyes. The paper range is Ciao Bella. I have started first by dry brushing the background of the paper with white acrylic paint, and then stamped randomly before adding the elements. 
The leaves, the window, the circle frame, the lace, the clock and the leaves have all been painted in white. Once the leaves have dried I have dry brushed them with Dusty In Colour paint Pesto colour, and then once that was dry, I sanded lightly over the leaves. 
The window frame and the circle frame have all been mounted with foam tape so I was able to tuck flowers under these frames.
Once all the flowers were added, I have cut the leaves up and inserted these among the flowers. The title has then been painted with blue acrylic paint.
The title has been stuck on last, on top of the flower clusters

Thank you for visiting!

Here are the products I have used:

Saturday, 23 November 2019

Never Stop Exploring - 49 and Market

Hello 49 and Market fans!

Today I am showcasing another layout with the latest release - the Seaside collection. These new collections are really gorgeous - one can't help using them over and over again. So here is my latest layout

The base page is Seaside Cottage, and I have used the reverse side.  At first I used some clear gesso, and then added some stencilling with texture paste. I have stamped with a script stamp from the "Gabi's Postcards from Paris" stamp. I added some blue ink and spritzed with water. I then added some some dark navy paint splatters, and then some white paint splatters. The photo is matted on some post card cut from the Vintage Remnants Laser Cuts no 2.
I added the photo and laser cuts to the page on mounting foam for height. Using the 5 ply cording jute, I made a fisherman's knot and added this to the photo at the bottom. Once this was done, I added the light house from the Seaside laser cuts, and added foam tape that this was the same height as the photo. I have added the flowers and Seaside laser cuts in layers and also mounting these on foam as required for height. The shells from the laser cut sheet have been curled to give them a three-dimensional shape.
I made up the porthole from the archival "never stop exploring" chipboard and also mounted this on foam tape and added the little ship on foam tape in the centre.

I have then used a mixture of the Sky and Cobalt coloured country blooms, as well as one white wildflower. I have then added laser cuts. The netting from the archival chipboard has been painted with acrylic paint and I have then added some blue ink to the flowers of the archival board and spritzed these with water. I have used the rock from the "Underwater" layered embellishments and I have cut this in half and added it to either side of my flower cluster on the left. I have then added the title from the archival chipboard ontop of the flowers, finishing off with some art stones.

Have a lovely day, and thanks for visiting!
Products used:
https://www.49andmarket.com/product/layered-embellishments/
https://www.49andmarket.com/product/seaside-seaside-cottage/
https://www.49andmarket.com/product/country-blooms-sky/
https://www.49andmarket.com/product/country-blooms-cobalt/
https://www.49andmarket.com/product/6x6-archival-board-never-stop-exploring-white/
https://www.49andmarket.com/product/seaside-12x12-mini-collection-pack/
https://www.49andmarket.com/product/jute-cording-5-ply/
https://www.49andmarket.com/product/wildflowers-cloud/
https://www.49andmarket.com/product/gabis-postcard-from-paris/


Friday, 22 November 2019

Totally Cute - Dusty Attic

Hello lovelies

Today I am up on the Dusty Attic blog with a layout using the November moodboard
Such soft and beautiful colours - I love the shades of this moodboard, and decided it really needed to be something soft and girlie - and when I saw this photo (acknowledgement to Pexels.com) I thought the colours of the moodboard were perfect.
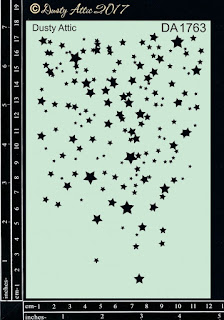
I first applied clear gesso to my page, and then applied some texture with texture paste using the Starry Night stencil. Once this was dry, I applied some pink ink to the stenciled areas spraying with a little water. Once this was dry, I then splattered some pink ink and white paint. I then also stamped in light grey with  script stamp. The leaves and the circle frames were embossed with yellow and pink toned embossing powder. I then framed the photo in the smaller frame and inserted this to the side of the larger frame. This has been mounted to the page with foam tape and then I added the flowers in layers and on foam tape for dimension.

I added the leaves to the flower cluster. I then painted the Elegant Pearls chippy with Dusty in Colour Pink paint and added some flourish gems to these, and tucked this under the flowers.
I have also painted the wire in the same pink and the Creative Script chippy in Dusty in Colour Cashmere. These have all been cut to various shapes and have added these pieces to the layout.
The butterflies have also been painted with pink paint, and I have then added Stickles to the wings.
Here are some more close ups


These are the products I have used:
DA1763


Thank you for popping by,
Michelle


Thursday, 7 November 2019

Treasure - 49 and Market

Hello 49 and Market friends,

Today I am showcasing a layout that I have used a variety of different collections and elements. This is a great way to use up some of those leftovers, to accentuate your layouts
My base page is the Shipwreck Discovery Cove paper and then tearing the Seaside Beachfront paper adhered this to the base page. I have used frames from the Vintage Remnants Laser Cut shapes no 2 to mat my photo and then I have used the blue and peach coloured "stamps" from the Bold & Beautiful Laser Cuts sheet. I have also used the leaves from this Bold & Beautiful laser cut sheet.  These stamps were matted with foam and then I matted the photos on top of this. I then started with the large flower Scarlet Country Bloom on foam tape and then layered some Tangerine Country Blossoms, Sky Country Blooms and Sky mini blooms, plus laser cuts from the Seaside sheet.
I then added the laser cut flowers and leaves layered between blooms - often using foam tape to lift these to add dimension. I have also added some the watering can and the padlock from the Sweet Reflections laser sheet. I have also added some single ply jute under the flowers.
The flower cluster on the top left side is also using the same flowers and laser cuts. I have finished off adding some art stones and the title is from the Archival Chipboard "Treasure".


Products used
https://www.49andmarket.com/product/seaside-beachfront/
https://www.49andmarket.com/product/shipwreck-discovery-cove/
https://www.49andmarket.com/product/vintage-remnants-laser-cut-shapes-frame-set-no-02/
https://www.49andmarket.com/product/seaside-12x12-mini-collection-pack/
https://www.49andmarket.com/product/bold-and-beautiful-laser-cut-sheet/
Thanks for visiting, have a super day.