Sunday 26 March 2023

Every photo tells a story - Dusty Attic

Hi there,

I am sharing a canvas I created for the February moodboard

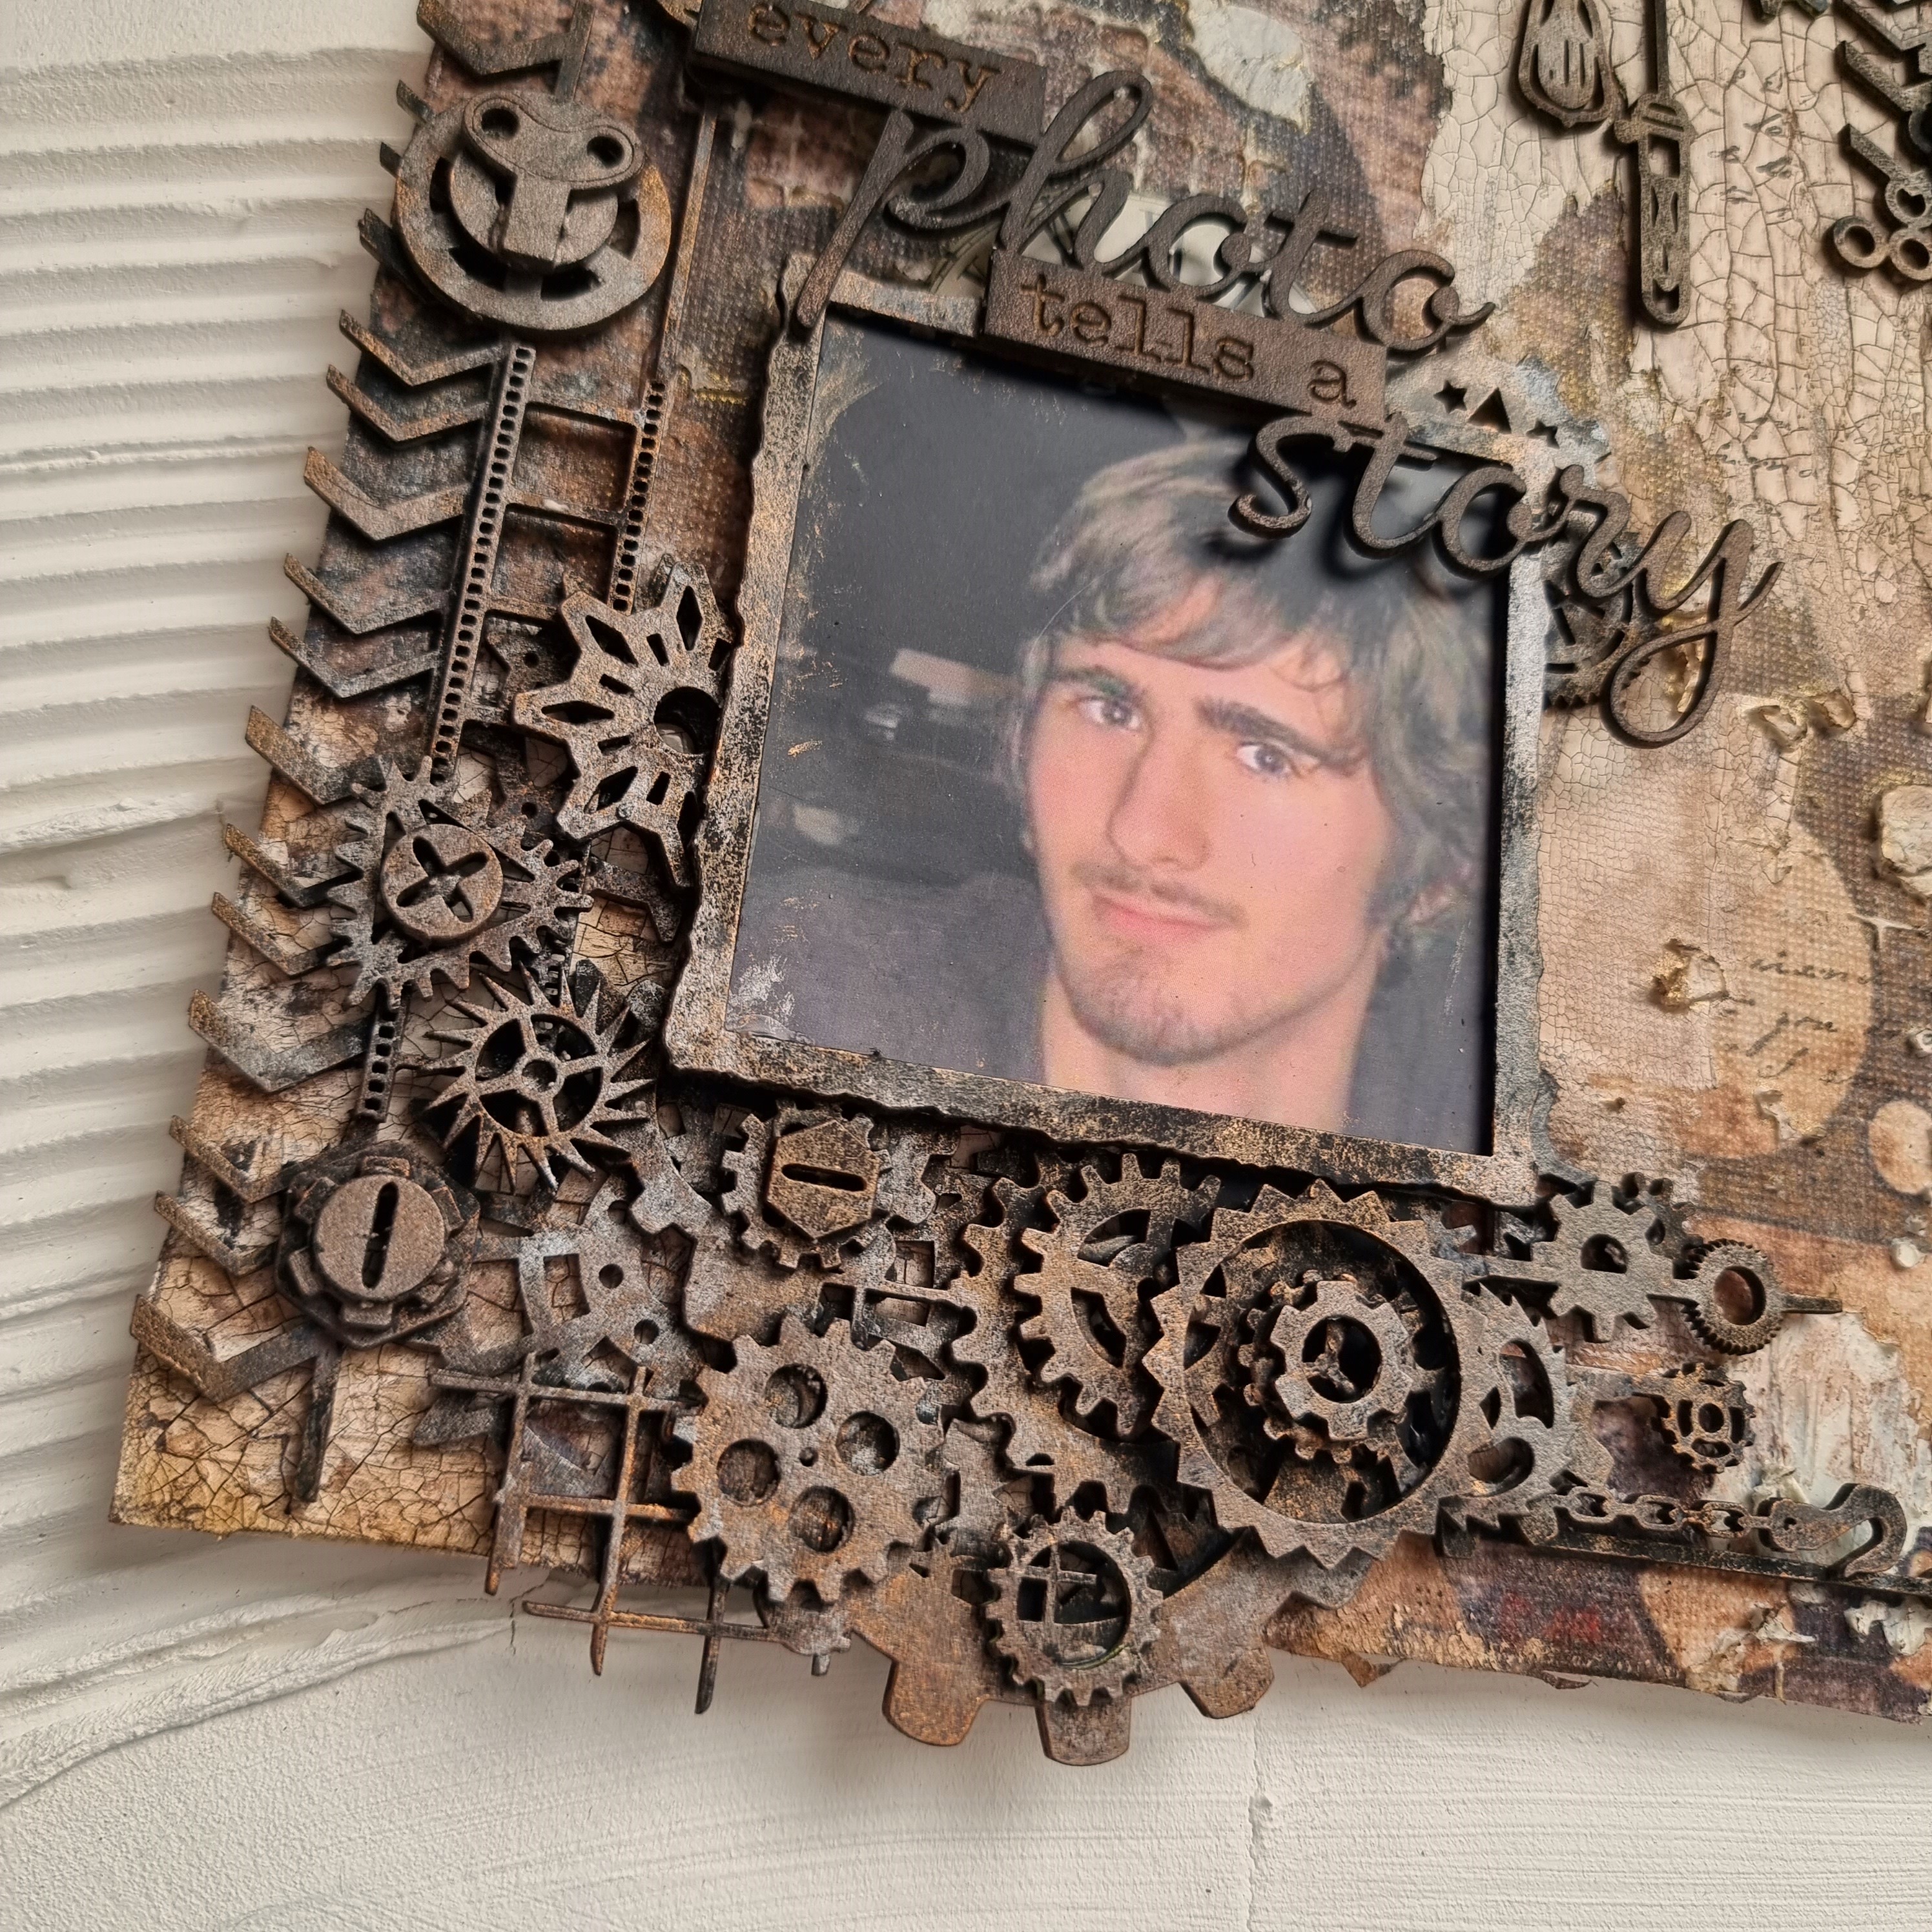
I drew inspiration off the circular macrons, and the edges of the lace under the coffee cup and thought that this reminded me of gears and I created this canvas
The canvas is covered with a prima tissue paper, then covered with matt gel. When this was dry I added crackle paste and when that was dry I used the the Distressed Grid Stencil DA1538 and used this in places with modelling paste.
All the chipboard was prepared with black gesso. 
I used a combination of gears - DA2734, DA2744, DA2859 and DA2864, as well as industrial clusters DA3374 and DA3377. I also used Industrial Globes DA2184, mini film strips DA2511, layered bolts DA2880 and the small distressed frame DA2872.

I first started layering the gears and bolts and built these up in the left bottom corner and top right corner, building these up to create clusters of gears.
Once this was all layered, and the frame was added, I started dabbing all the cogs with ARTalchemy waxes in browns and iron colours - using a round paint brush, until all the black gesso was covered. The title DA1783"every photo tells a story" was added last.

These are the products I have used:


Thanks for visiting the blog today. And why not take part in the March moodboard challenge and post your entry to the Facebook DustyFANattics page.

Till next time,
Michelle


Remember this moment always - 49 and Market


Hello lovelies

I have a layout created using the Color Swatch Eucalyptus range and some bits from the Vintage Artistry Tranquility range.

The base of the layout is the bonus sheet from the Color Swatch Eucalyptus paper range. From there I matted the photo with a mix of layered Eucalyptus frame sets (edges were distressed) followed with lasercut pieces and Vintage Artistry Tranquility ephemera. This was all added with a foam tape to the centre of the page so I could still add flowers, rubons and other lasercut pieces underneath.


I also added the two Eucalyptus doily lasercuts.

From here I added Vintage Artistry Tranquility rubons from the 12x12 transfer page around the matt, as well as adding the Eucalyptus acetate filmstrips.

I then started with the flower cluster on the left using Nature's Bounty Taffy flowers (new release) and Florets Taffy (also a new release) - mixed in with leaves and flower bits from the Eucalyptus laser cuts and the Tranquility ephemera. 

I broke some of the flowers apart and also made a flower cluster on the right adding on the dragonfly and butterfly from the Eucalyptus lasercuts. To the top right and bottom left corners, I added the 3 butterflies from the Tranquility rubon 12x12 transfers and cut these in half before adding to either side of the page.

I finished off adding the title "remember this moment always" from the Eucalyptus lasercut sheet, adding some of the rubon splotches from the Tranquility rubon sheet, as well as tearing a v-section at the top of the page adding the word piece "look at you" also from the Eucalytpus lasercuts and the adding the pink tickets from the Tranquility ephemera pack into the "v".


Thank you for visiting the blog :)

Hugs,
Michelle

Saturday 11 March 2023

Sweet - 49 and Market

Hi there.

I am soooo loving this beautiful Vintage Artistry Tranquility collection - such pretty, soft colours. 

When I saw the Tranquility laser cut flowers, I just knew I needed to use these on my layout. The base of the layout is done with the Bravado paper from the 12x12 collection pack. The photo was matted onto cards from the Ephemera pack and then adhered to the paper with foam tape to the centre of the matt - this would allow me to add the laser cut flowers under the photo matt with foam tape and then create the flower cluster around the photo.
I started with the bigger pieces to each side of the photo and then added the single flowers and leaves and built up the flower frame - using foam tape to create dimension

I love the long bubble flowers and the single stems, these were all added to hang out and down also with foam tape.
In among the cluster, I have also added chipboard pieces and a ticket from the Eucalyptus Ticket Essentials pack. The lace doily is from the laser cut elements and I cut this in half and added one part at the top and the other part at the bottom.
I also added rub-ons to the Bravado paper - around the photo and and the edges of the paper. I have also added strips of Tranquility washi tape to the top and bottom of the paper.

I finished off adding the chipboard title "Sweet" and some crystal beads.

Thanks for visiting the blog today.

Hugs,
Michelle


https://www.49andmarket.com/product/vintage-artistry-tranquility-12x12-collection-paper-pack/
https://www.49andmarket.com/product/vintage-artistry-tranquility-bravado/
https://www.49andmarket.com/product/vintage-artistry-tranquility-6x8-rub-on-transfer-set/
https://www.49andmarket.com/product/vintage-artistry-tranquility-laser-cut-elements/
https://www.49andmarket.com/product/vintage-artistry-tranquility-laser-cut-wildflowers/
https://www.49andmarket.com/product/vintage-artistry-tranquility-ephemera-bits/
https://www.49andmarket.com/product/vintage-artistry-tranquility-chipboard-words/
https://www.49andmarket.com/product/vintage-artistry-tranquility-washi-assortment-set/
https://www.49andmarket.com/product/color-swatch-eucalyptus-ticket-essentials/


Friday 3 March 2023

Todays Memories are Tomorrow's Treasures

Hello lovelies

Well here we are in March already, can you believe it? Here is my layout for this month: 

I have started with two papers, tearing one down top and bottom before adhering to the page. I then add the photo with foam tape, before adding all the fussy cut pieces under it.
I have used DA0335 mini scroll as flourishes - there are two in the pack. These were painted with metallique acrylic paint and then tucked under the fussy cut elements. I then dry brushed a tinged of rusty coloured paint over the chipboard pieces.

The Mini Foliage #2 DA2786 comes with a variety of different shaped mini leaves - and I have used the oak leaves and added these under the laser cut elements - painted with the same acrylic paints, lightly sponged on so as not to lose the veins in the leaves.
The title "Today's Memories are Tomorrow's Treasures" was also lightly sponged with paint so as not to fill the letters with paint, and added to the photo with foam tape.

These are the products I have used:


Thanks for visiting the blog today.

Hugs,
Michelle