Wednesday 26 January 2022

Smile - 49 & Market

Hello!

Have you being seeing all the sneak peeks of the new collections ARToptions Avesta and Curators Botanical on social media lately? And don't these new releases look just absolutely AMAZING?! I have been fortunate enough to have a little play with ARToptions Avesta - and my goodness the products in this range are just absolutely gorgeous and there is a wonderful array of embellishments to play with. 

I  had such fun putting this layout together. I started with the reverse side of the Avesta paper called flutterbies (from the paper collection pack). I then added the green stitching from the Curators stitched set washi tape around the edges. I used the pressing tool from the rubon pack to smooth it out on the paper - the background being so light, one can hardly tell its washi tape.
I matted the photo onto pieces from the Avesta Ephemera pack before adhering this to the page with foam tape. I first played around with the lasercut flowers and leaves to see where I would lay them before adding the rubons from the Avesta 12x12 rubons sheet 

The top right rubon is made of two different pieces which I cut to make this effect.Using foam tape as needed, I then layered all the die cut flowers and leaves with the stamps around the photo. The butterflies were added with glue down the centre and foam tape under the wings to lift the wings for dimension.
The lace lasercut dies have been cut into two and I have added these under the layers of ephemera under the photo. I have added some Avesta fabric tape and Curators stitching washi tape to the left top and bottom right corner.

Thanks for popping over to visit the blog today - I hope you love this new collection as much as I do. 

Till next time, take care
Michelle


Friday 14 January 2022

Fun Times - Dusty Attic Moodboard (January)

Hello lovelies

The moodboard for January is so appropriate for January here in NZ - reminder of summer days and the beach - we have had some really great summer days over the holidays, and have done a few days on the beach. 

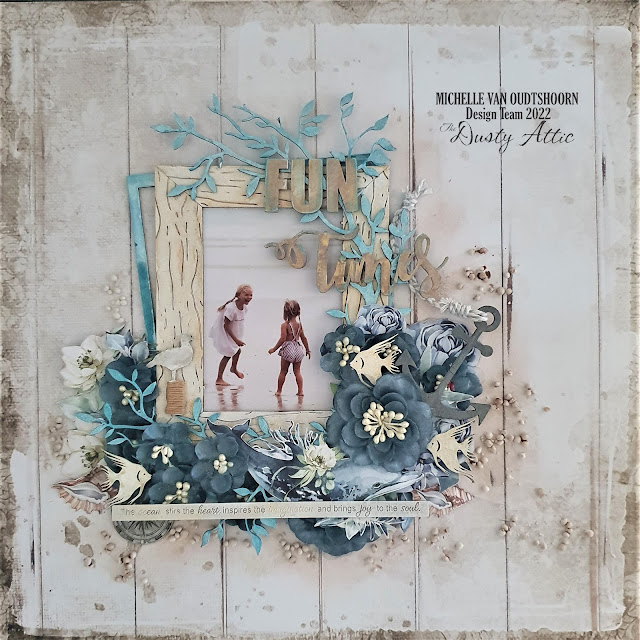
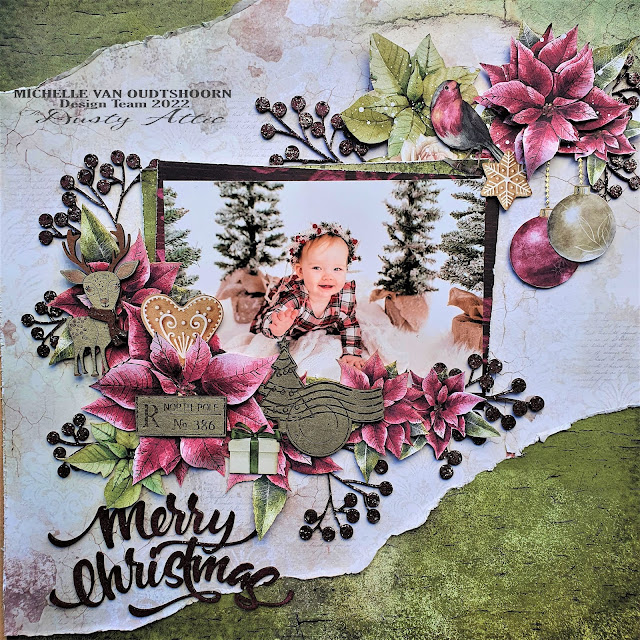
The colours and the photo of the moodboard inspired me to create a beach layout
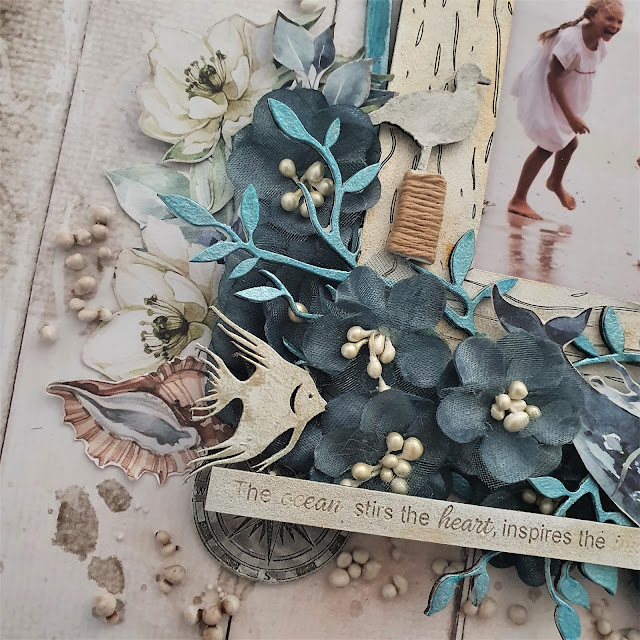
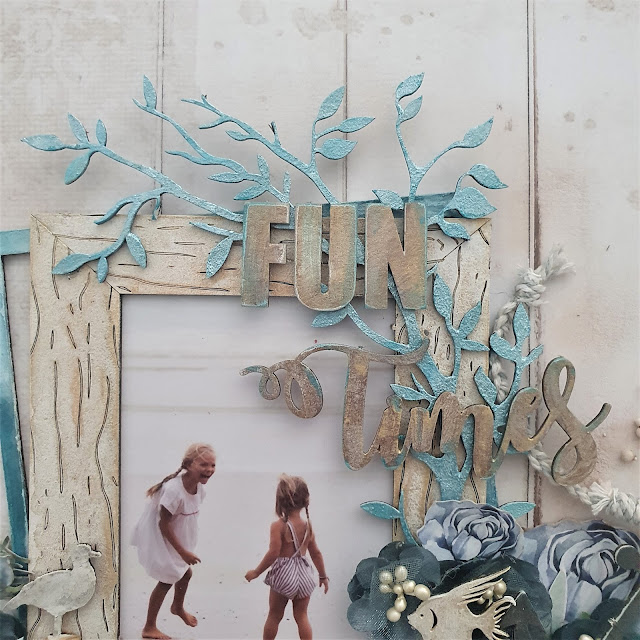
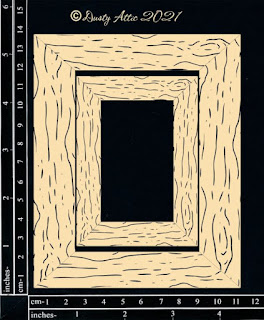
Dusty Attic have a great range of nautical themed chipboard to choose from. I first painted all my chipboard with white acrylic paint. I started first with the frames - both frames are from the chipboard DA3017 - the thin frame is the negative attached to the outside of the frame from the same pack. With both of these I watered down the acrylic paints and let them run so that I could have various shades of browns for the wooden frame and teals for the thinner frame.
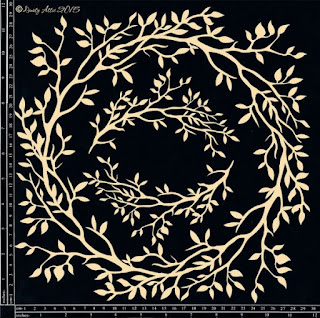
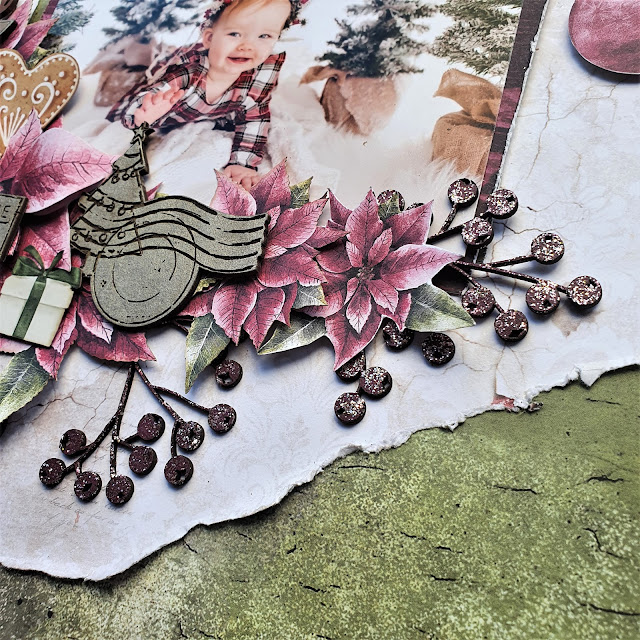
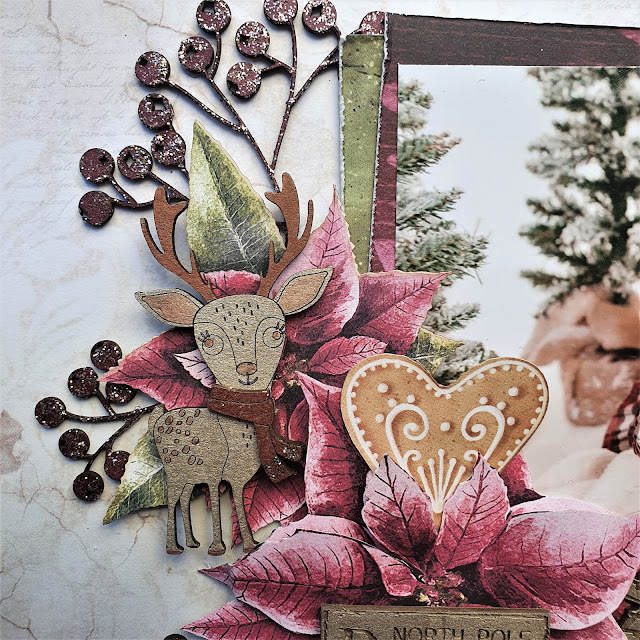
I attached the photo behind the wooden frame and then the thin frame at an angle before adhering to these to page. I then painted the smaller leaves from the leafy frame (DA1358) and attached this to the frame, layering flowers and fussy cut elements.
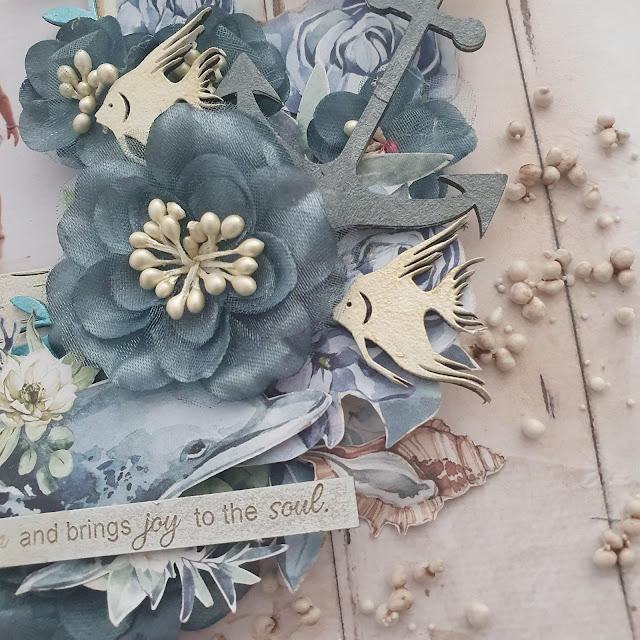
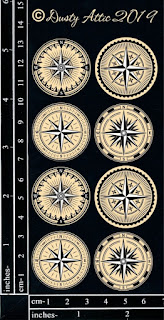
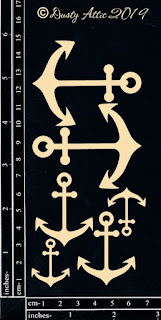
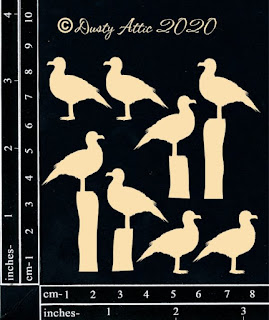
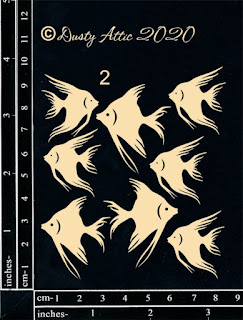
Once the flowers and fussy cut elements were done, the fish (DA2774), the anchor (DA2543), the compass (DA2381), and the seagull (DA2686) were added among these - I have used some twine around the base of the seagull.
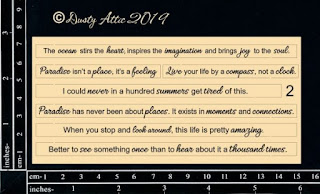
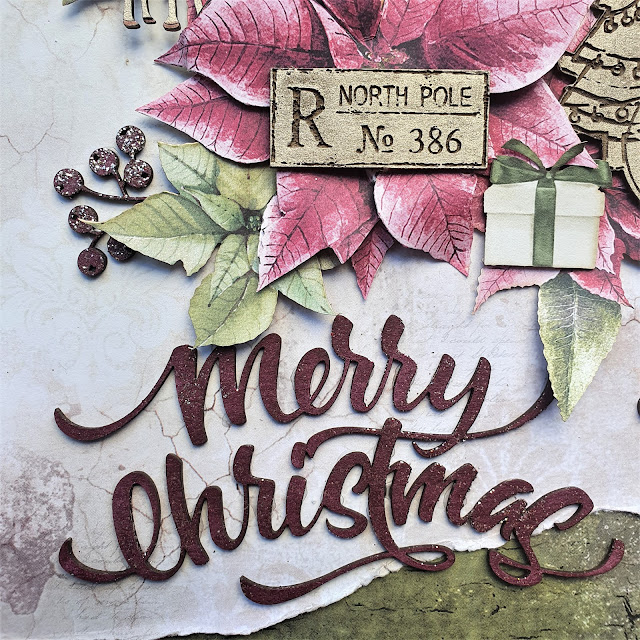
The quoted sentiment (DA2545) reads "the ocean stirs the heart, inspires the imagination and brings joy to the soul" - such a lovely quote! I then added the title "Fun Times" (DA2493)- which is also painted in white, then dabbed with watered down acrylic browns and gold paint. Once this was dry, I sanded the edges and added some teal paint.
The layout was then finished off with art stones and dabbing these with watered down acrylic paint.

These are the chipboard pieces I have used:


Take part in the challenge by using the moodboard as inspiration for for your layout/project and post a photo of it to the DustyFanatics Facebook page. You could win one of $50 chipboard voucher!

Take care,
Michelle


Tuesday 11 January 2022

Autumn Days - 49 & Market

Welcome to 2022!

Best wishes for the New Year. I hope you all had a good Festive season. I am so excited to be back on the team for 2022 - and the sneak peaks of all the new products we have been getting look so amazing. We are all in for a treat! As I write my blog post, these new products have landed in New Zealand - I am just waiting very eagerly for the delivery man to arrive .......

So while I wait, I have a layout created with Vintage Artistry In The Leaves Collection.

The base page is the reverse of the paper called Seasoned. First I framed my photo with a frame from the laser cut sheet in the pack and then added a matt behind it also from the laser cut sheet - these were all layered with foam tape before adding to the paper with foam tape. I then began to layer the leaves and flowers from the laser cut sheet adding Rustic Bouquet and Rustic Blooms in Marigold flowers among these. I have added a "bow" from the laser cut sheet - adding a tag "fall" with the bow.

I have curled the acorns to give them a dimension look. 
I added some laser cut leaves to the left of the photo, adding the the butterfly bending up the wings.
The title "Autumn Days" from the laser cut sheet has been distressed and then added to the frame with foam tape. I have then added rub-ons from the Vintage Artistry Teal and Mango rub-ons, using the script type splatters around the layout, as well as the sequins and some wording. To finish off, I have also added some Coral wishing bubbles and baubles.

Have a great day!

Cheers
Michelle


Monday 3 January 2022

Merry Christmas - Dusty Attic

Greetings!

A very happy new year to you! Here's hoping that 2022 will be a safer, healthier and happier year for us all. 

I have decided to do a Christmas layout, as inspiration for all those Christmas photos that were taken over Christmas. Dusty Attic have some great Christmas chippies, so I thought creating a Christmas layout would be a good way to show you these amazing chipboard pieces. 

I have used a mix of Mintay papers and Ciao Bella papers to create my layout. The Christmas Postmarks (DA3149) and the Reindeer (DA3154) have been coloured using a metallique champagne coloured stamp pad. The Merry Christmas (DA3206) and the Christmas Berries (DA3143) have been coloured using a burgundy coloured stamp and then I have used Platinum Stickles to add glitter to the these.
The photo was matted first and added to the page with the leftover chipboard of the Merry Christmas title (leftover chipboard is great for adding dimension - I cut mine up and keep this in a bag). I layered the flowers and the added the berries.
I then added the postmarks and the this cutest reindeer. I used watered down ink from a stamp to colour in the eyes, the antlers, the scarf and the spots on the reindeer. 
The Merry Christmas title was added last. I added a little less stickles to the title.
Thank you for visiting the blog today. Happy scrapping your Christmas photos! Check out the Dusty Attic website to see their latest Christmas range.

These are the products I have used:


Till next time, take care
Michelle