Saturday 26 November 2022

Merry and Bright - 49 and Market

Hello 49 and Market fans

A month to go before its Christmas - and what better way to showcase your memories by using the gorgeous range ARToptions Holiday Wishes for those Christmas photos.

I have used a combination of papers to form the base of the layout - The mainpaper is the Holly Whisps paper, which I cut down and distressed the edges, added a strip on either side cut from the reverse side of the Village paper and then added a stripout the middle of the Picking the Tree paper to the left to take the page back to 12x12. The photos were framed using Curators Essential Key Lined Chipboard Frames, adhered to the page with foam tape. I then added layers of Holiday Wishes Ephemera and Holiday Wishes Lasercut Elements behind the frames/
The little button hearts are from the lasercut elements. From here I used some of the poinsettias from the lasercut elements and also fussy cut some of these from the bonus sheet included with the Holiday Wishes 12x12 paper collection pack.
The Christmas truck, stamps, twine and holy leaves are all included with the Lasercut Elements sheets. These twine bows are just amazing! I have added a chipboard "HoHoHo" from the Holiday Wishes chipboard pack. I have also rubbed on various music notes and stars from the 6x8 Holiday Wishes Rubon pack.
I have created a cluster in the bottom left corner of the layout using fussy cut poinsettias, and twine and another cute button from the lasercut sheet. The holy leaves are all rubons from the 6x8 rubon pack, as is the word "December"
I have finished off adding the a rubon title "Merry and Bright" 

Thank you for visiting the blog today.

Hugs,
Michelle


https://www.49andmarket.com/product/artoptions-holiday-wishes-12x12-collection-pack/
https://www.49andmarket.com/product/artoptions-holiday-wishes-picking-the-tree/
https://www.49andmarket.com/product/artoptions-holiday-wishes-holly-whisps/
https://www.49andmarket.com/product/artoptions-holiday-wishes-laser-cut-elements/
https://www.49andmarket.com/product/artoptions-holiday-wishes-ephemera-bits/
https://www.49andmarket.com/product/artoptions-holiday-wishes-chipboard/
https://www.49andmarket.com/product/curators-essential-key-lined-chipboard-frames/
https://www.49andmarket.com/product/artoptions-holiday-wishes-6x8-rub-on-transfer-set/
https://www.49andmarket.com/product/artoptions-holiday-wishes-the-village/


Thursday 17 November 2022

So Beautiful - Dusty Attic

Hello DustyFANattics

A lovely bright and colourful moodboard this month - it just exudes happiness!

And why not use the November moodboard as inspiration to create a project using Dusty Attic chipboard and post  it to the DustFANattics facebook page by the 30th November. You could win one of two AUD50 credits of Dusty Attic chipboard. Here is my take drawing my inspiration off the colours.
All the chipboard has been painted with a mix of chalk paint and art alchemy paint. The foliage used are DA3304 (Foliage clusters) and DA3349 (Botanic Mix). I first painted these and then added my matted photo to the page. Once dry, I arranged the leaves around these and under the photo. One of the pieces of foliage I cut into smaller pieces and added among the flower cluster.
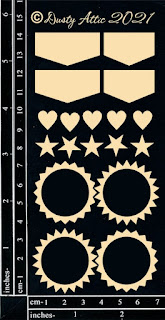
I have used some pieces like the hearts and the jagged circular pieces from the Tabs and Starbursts (DA2946) - these were tucked in under and around the flowers.
I have added some pearls to the flowers and leaves.
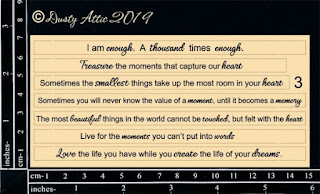
The phrase "Love the life you have while you create the life of your dreams" is a sentiment from the Quoted Sentiment #3 (DA2582) - I have dabbed the sentiment lightly with a touch of paint on a sponge so as not to fill the words with paint.
I have created a little cluster in the top right corner, using some of the foliage and adding the word disc from the Page Pebble #3 collection (DA1107) So beautiful, which is the title of my layout.

These are the products I have used:


Hugs,
Michelle


Friday 11 November 2022

Fabulous - 49 and Market

Hello lovelies

And another gorgeous collection to showcase for this post - ARToptions Plum Grove. I am just loving these beautiful colours. 

Foundations 1 is the paper I have used for the base of the layout from the Plum Grove Colored Foundations pack, the reverse side of the Plum Grove Blossom paper (from the Plum Grove Collection paper pack) was torn down and adhered to the Foundations 1 page. I chose two pieces of ephemera from the Plum Grove Ephemera pack and cut these down to size for my photo, corner round the corners, distressed these and adhered my photo to them. The frame is from the Plum Grove Lasercut Elements pack. The flower cluster at the top of the right corner of the photo is a large wildflower cluster from the Lasercut Wildflowers pack, which I adhered to the page with foam tape and then added my photo mat. 

I added a single large Wildflower to match over the same flower and curled the leaves slightly to give it dimension in the corner. The butterfly on the right is added from the 6x8 rubon pack.
From here I layered a number of Wildflowers around the bottom left corner with foam tape.
I really love this purple, green and orange combination - the tickets and stamps plus the arrows are from the Eggplant Ticket Essentials. Some of the flowers I have also curled the petals to add dimension. The "You are the Spice of Life" title is from the Ephemera pack, as well as the title "fabulous"
I have also added the big green leaves - also from the Wildflower Lasercut pack, as well as the bud like fronds - and these have been mounted with foam tape.
I have finished off with some wording from 6x8 rubon pack, as well as the wording in the right bottom corner "you matter"


Thank you for visiting the blog today.

Take care,
Michelle

h


Thursday 3 November 2022

Live Your Best Life - Dusty Attic

As I write this blog for my post, it is a magic day here in Christchurch, NZ. It's nice and warm and there is some sunshine - which hasn't been present much through the last few weeks - we even had snow at the start of October. 

I have created a masculine layout to feature on the blog today. 

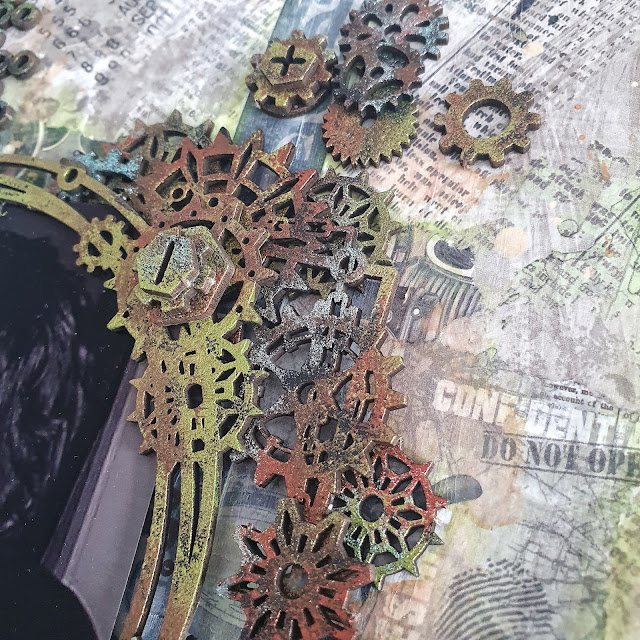
This is a photo of my son (a rare photo I might add, as he doesn't like his photo being taken).  I first prepped the paper with matt gel, and adding some strips of paper, adding some green water crayon, and blending this and then rubbed on some white gesso here and there. All chipboard pieces were first dabbed with black gesso. I then added various colours of Alchemy Metallique paints to the chipboard once the black gesso was dry. I dabbed on the paint colours sporadically, until all the pieces were covered in different shades of metallique paint colours.

I used the Industrial Circle Frame (DA3361) for the frame of my photo - this one I mainy stuck to green and brown paint. Underneath the photo, I used the Industrial Square Frame (DA3362). This I cut at an angle in half, so that I could add this under the photo and circular frame - keeping the pieces apart, and then added some broken bits DA3370, and an industrial cluster DA3378, before adhering all of this to the page.

I then built up the cluster with cogs and bolts from the layered bolts (DA2880) and the new mini cogs (DA3364). 
I added the title "Live Your Best Life" and then added some green and honey coloured oxide inks around the chipboard pieces on the layout.
These are the products that I have used:


Thanks for visiting the blog.

Hugs,
Michelle